|
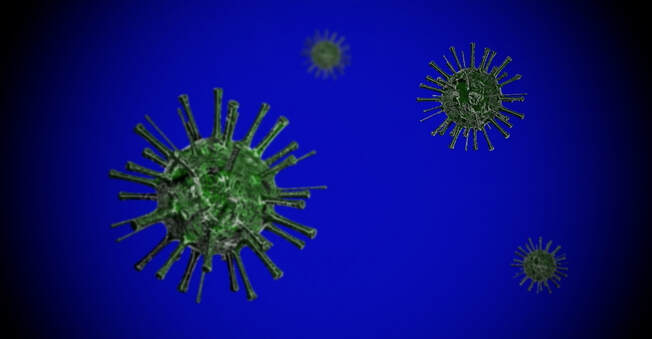
Blender 2.8X - Coronavirus scene
|
|
|
*This tutorial is for those who knows the basic Blender interface
|
|
Mesh Modelling
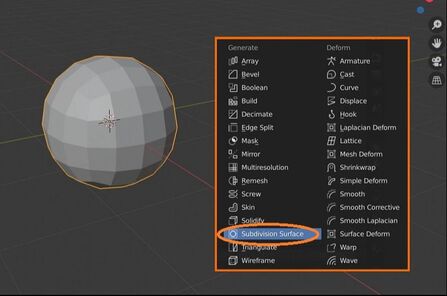
1. Rename the cube to 'Virus'. Then choose the "Modifier Properties" tab and Add a "SubD Surface" modifier.
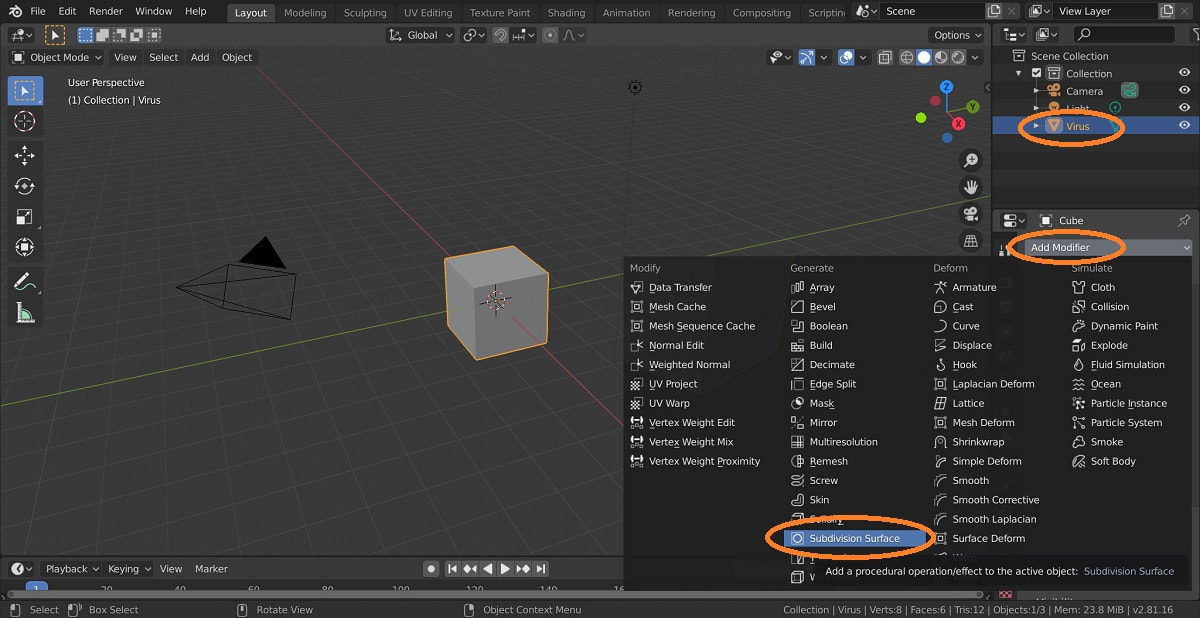
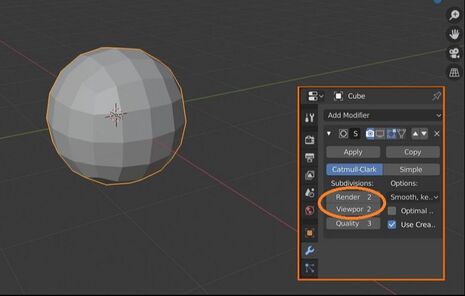
2. Input "2" for both Render and Viewport subdivision levels. Then apply once more a "SubD Surface" modifier.
|
|
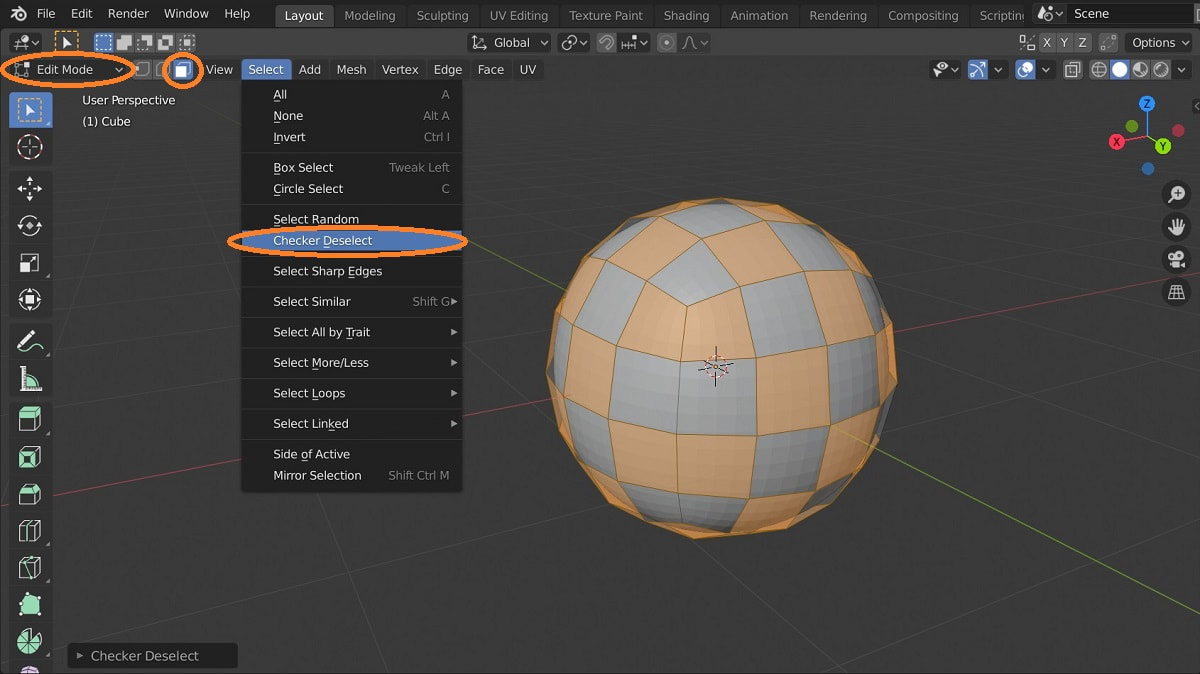
3. Switch to "Edit Mode" and use "Face selection", then hit "A" key to highlight all faces. Goto "Select" menu and choose "Checker Deselect" to deselect every alternative faces. *You might need to alter some selection manually.
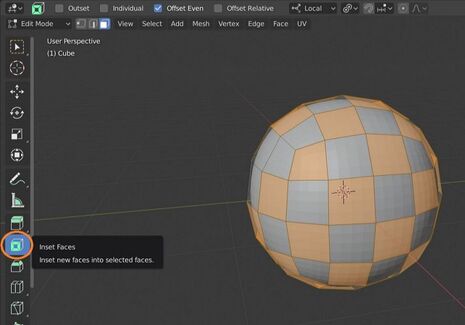
4. Apply "Inset Faces" and adjust the "Thickness" and "Depth" parameters alike the following image on the right.
|

|
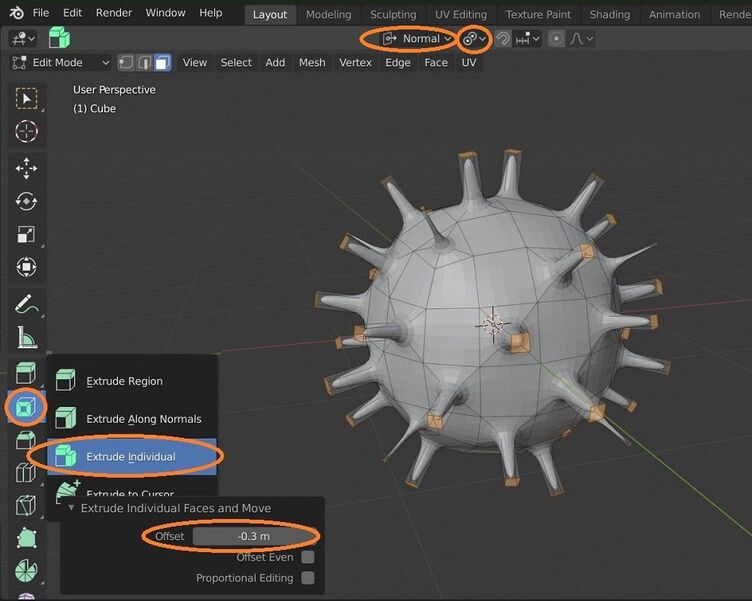
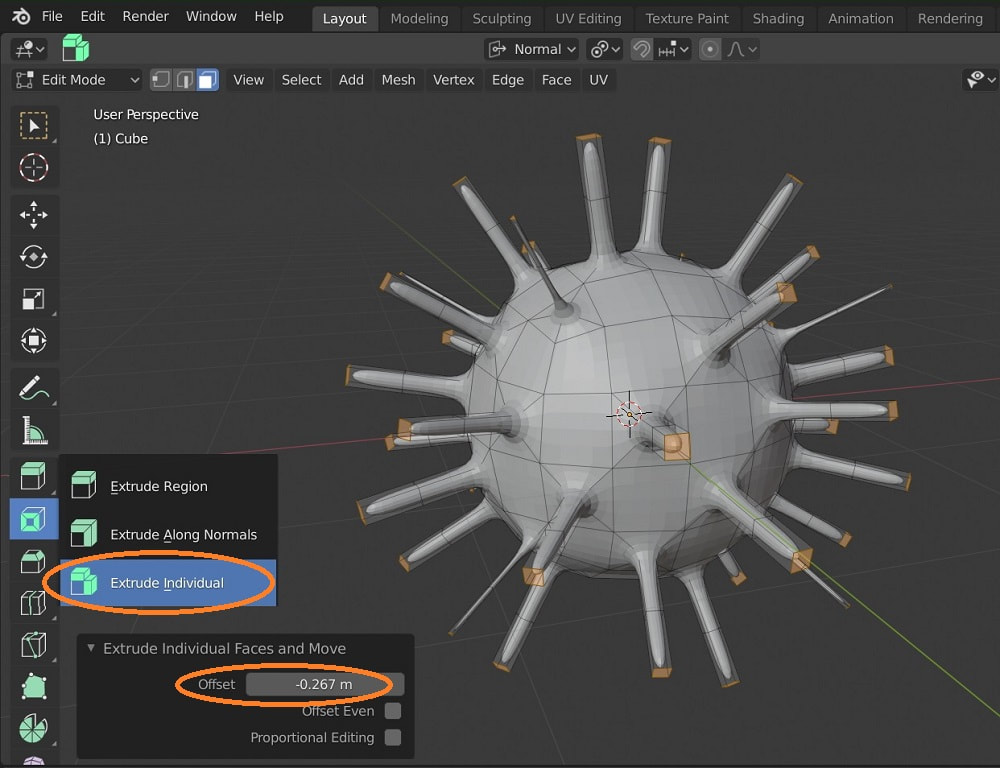
5. Switch the "Transformation Orientations" to "Normal" and the "Transform Pivot Point" to "Individual Origins". Then apply an "Extrude Individual" manipulator and offset the "local translate-Z" parameter to something alike the image underneath.
|
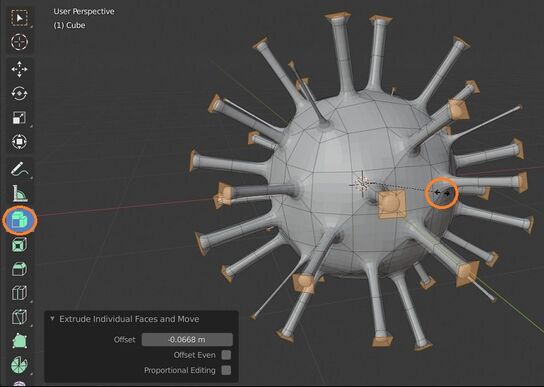
6. Apply another "Extrude Individual" and offset the local Translate-Z once more to something alike the image on the right.
|
|
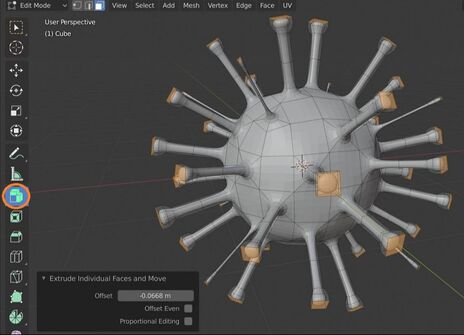
7. Apply a third "Extrude Individual" and then hold "S" key and Drag to scale up the newly created faces.
Then once more apply another "Extrude Individual" to complete the spikes.
Then once more apply another "Extrude Individual" to complete the spikes.
|
|
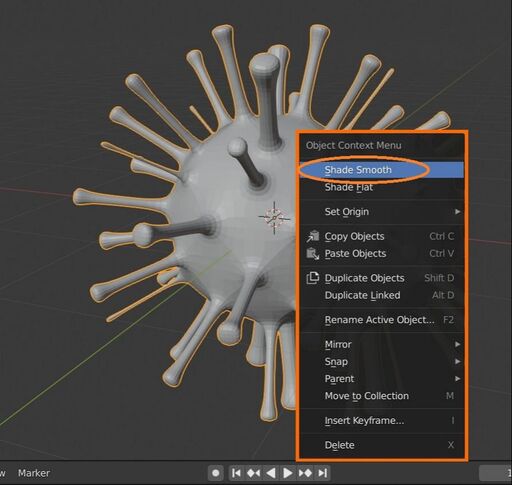
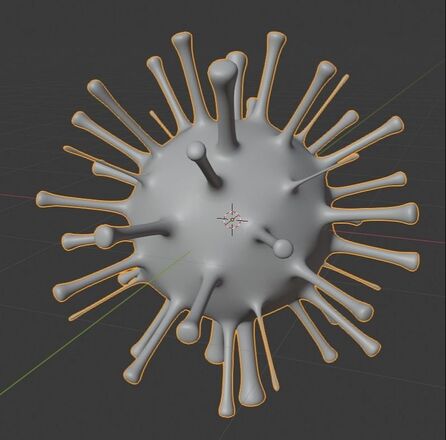
8. Switch back to "Object Mode". R-Click and select "Shade Smooth".
|
|
Experiment with custom shader nodes
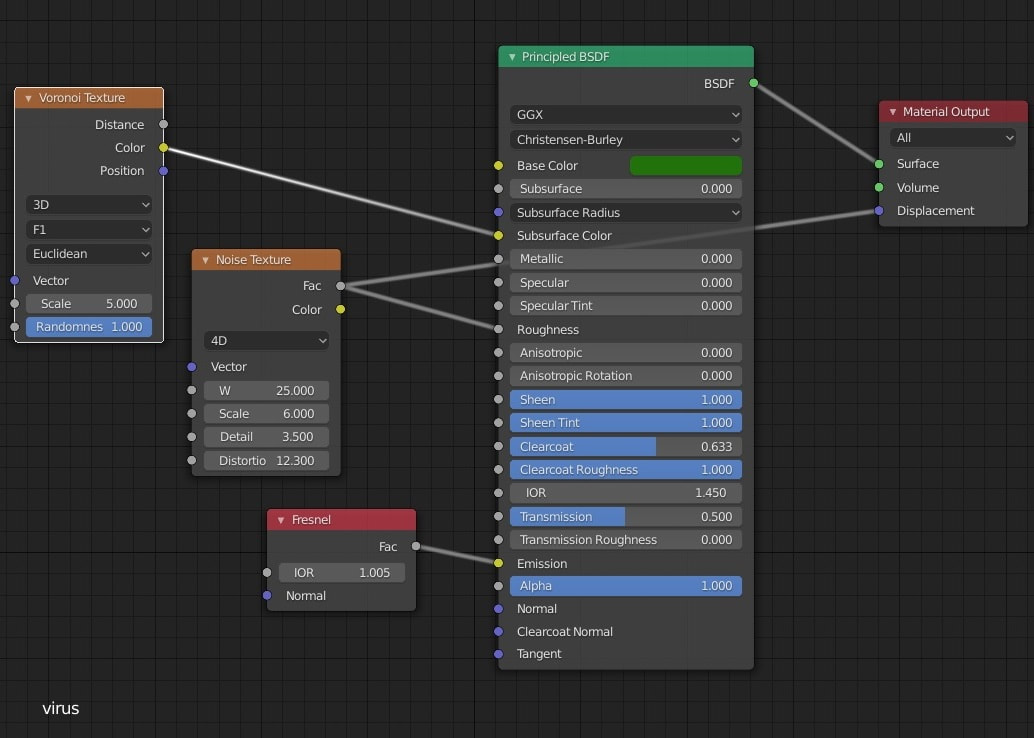
9. Alter the workspace and launch 2 "3D Viewports" with one using "Render Preview" mode (the bottom viewport) in order to preview the EEVEE result. Also launch a "Shader Editor" and feel free to add some custom nodes (following added a Fresnel Input, a Noise Texture, and a Voronoi Texture nodes) to the default Principled BSDF Shader. Pls. refer to the bottom image if you aim to achieve what we got in Step 10.
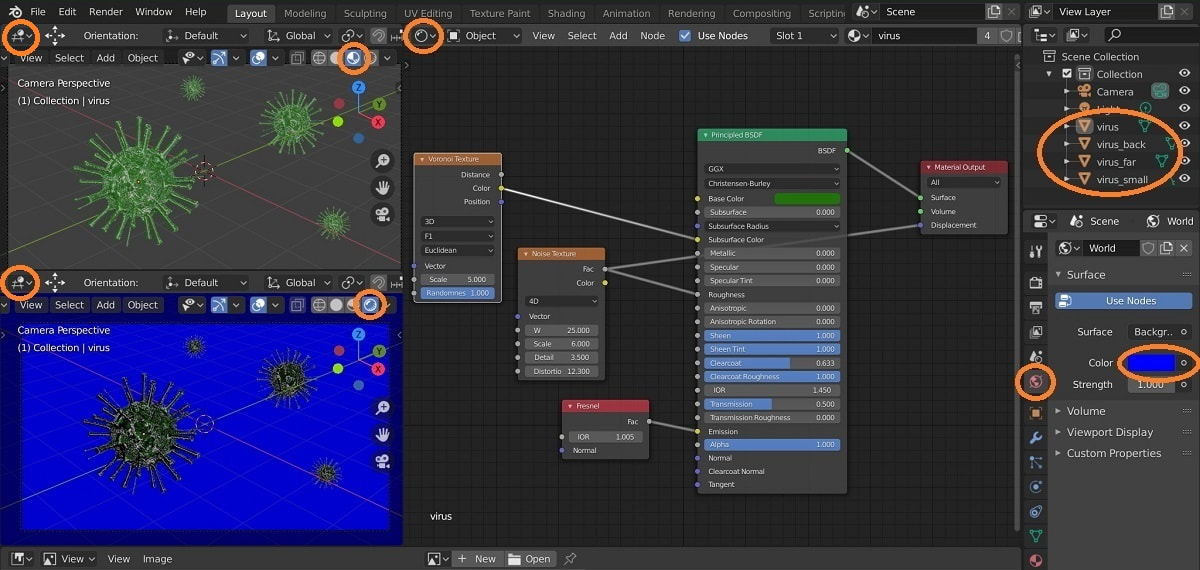
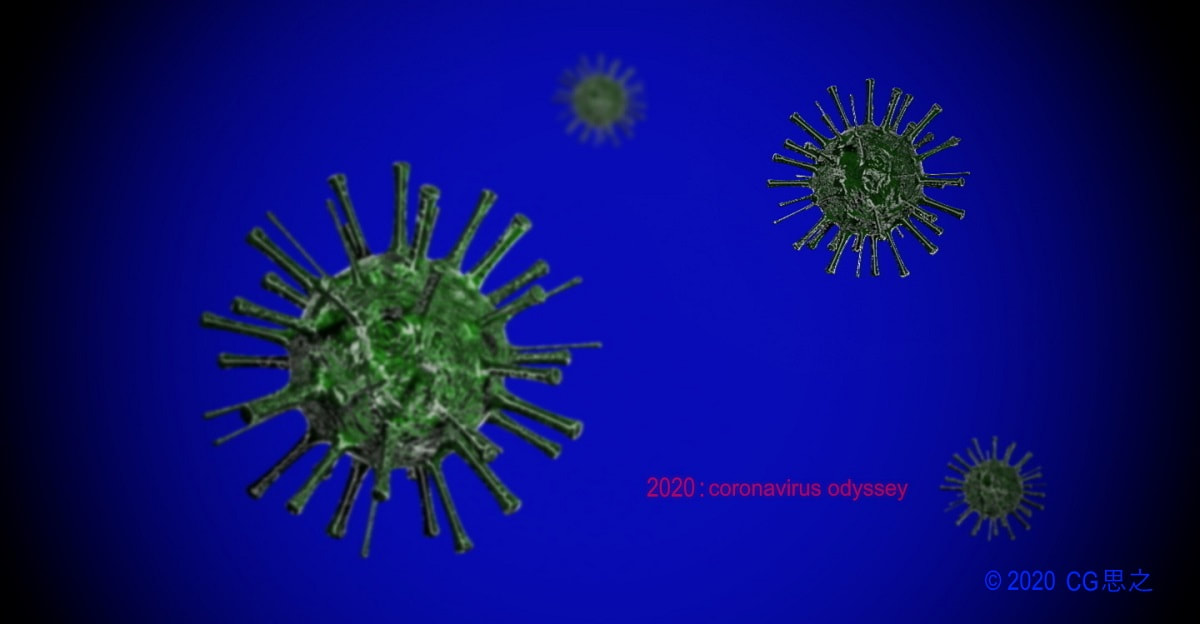
10. Apply 2D effects to the rendered outcome as wish.