
I MAKE Workshop is a collaborative workshop series tailor-made for The Hong Kong Polytechnic University's School of Design (SD) 'Creative use of 3D Printing technologies' event. Participants (local secondary school students) will learn the basic Blender Modeling for 3D printing.
|
Workshop 8:
1. Blender Camera setups 2. Basic Blender Lighting (3-point lighting) and Shadows 3. Basic Blender Sun Light 4. Basic Blender Lambert Shading 5. Create Blender Turntable Animation (basic Keyframe Animation) 6. Setup Blender Renderer and export to movie file |
|
|
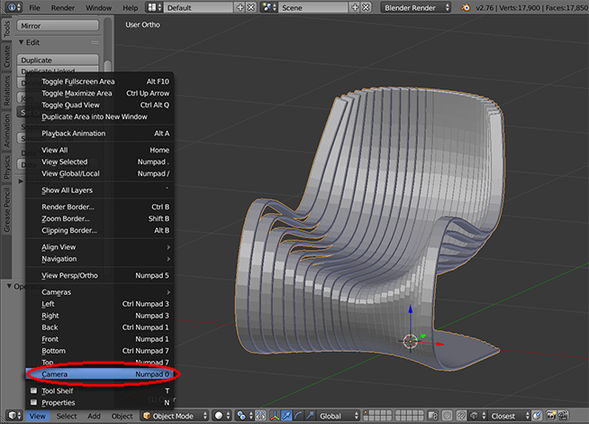
Turn on Blender's Viewfinder
Open your .blend file or import your model into the scene. Gogo "View" and choose "Camera" or simply press "0" key on the Numpad keyboard. |
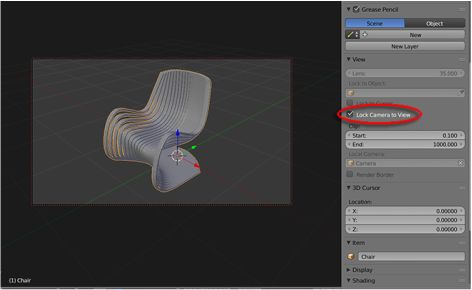
Lock Camera to View
In the viewport's property panel, check the "Lock Camera to View" feature and navigate the scene the same style to frame your scene.
In the viewport's property panel, check the "Lock Camera to View" feature and navigate the scene the same style to frame your scene.
|
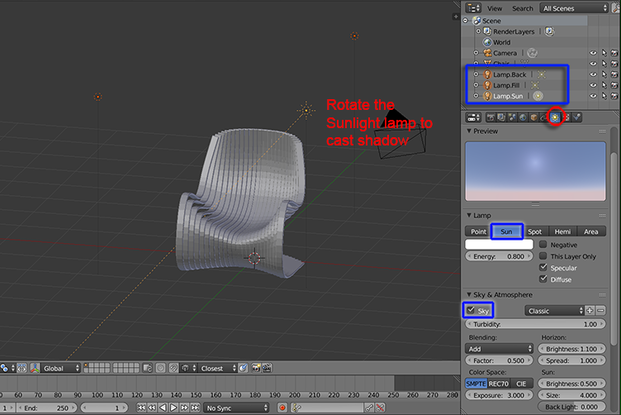
Create Lights for your scene
Goto the Light window inside Blender's Property panel. Apply the 3-point lighting technique and turn off both fill light and back light's shadow casting. In this class, let's try "Sun light" and preview to see your final render result. You can "rotate" the sunlight angle to cast dramatic shadows. |
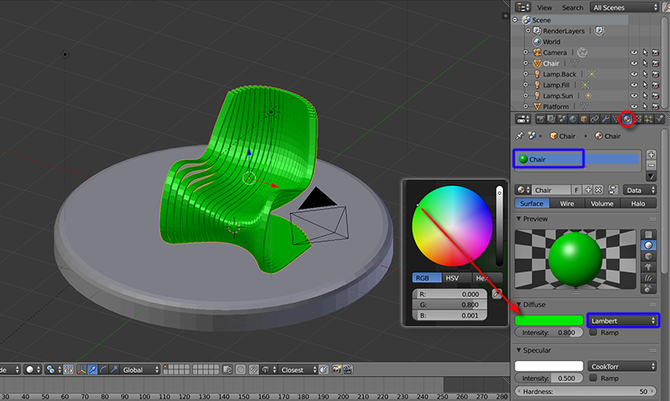
Assign Colour for your model
Goto the Material window inside Property panel. Firstly select your geometry model from the scene. Create a new shader node by clicking the "+" sign and rename it from "Material.001" to "Chair" in this class (You can assign another shader if you have built a podium). Under Diffuse section, use the default "Lambert" shader and click the colourbox to change it to your colour.
Goto the Material window inside Property panel. Firstly select your geometry model from the scene. Create a new shader node by clicking the "+" sign and rename it from "Material.001" to "Chair" in this class (You can assign another shader if you have built a podium). Under Diffuse section, use the default "Lambert" shader and click the colourbox to change it to your colour.
Setup animation format and create a Turnable Animation
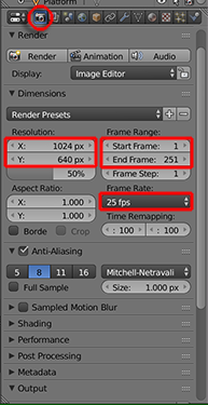
Goto Camera window inside Property panel, change the "Resolution" size to a proper format (I use 1024 x 640" to fit the 4:3 ratio projector for most classrooms). Under Frame Range, change to 1-251 if you want a 10 sec. PAL video format.
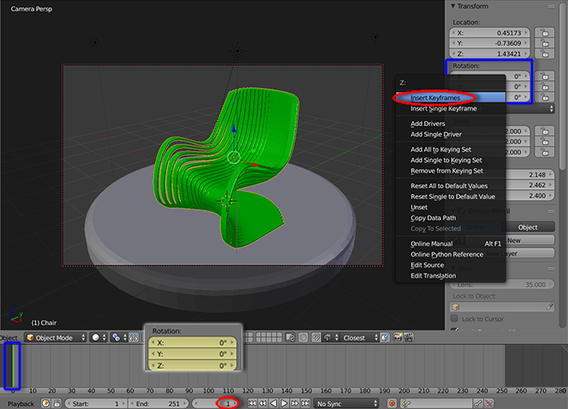
Inside "Timeline" panel, locate the current frame to "frame 1", then goto the "Rotate" section and R-Click to select "Insert Keyframes" to set your first keyframe. Once it's successful, you will see the dialogue boxes be highlighted in yellow.
Goto Camera window inside Property panel, change the "Resolution" size to a proper format (I use 1024 x 640" to fit the 4:3 ratio projector for most classrooms). Under Frame Range, change to 1-251 if you want a 10 sec. PAL video format.
Inside "Timeline" panel, locate the current frame to "frame 1", then goto the "Rotate" section and R-Click to select "Insert Keyframes" to set your first keyframe. Once it's successful, you will see the dialogue boxes be highlighted in yellow.
|
|
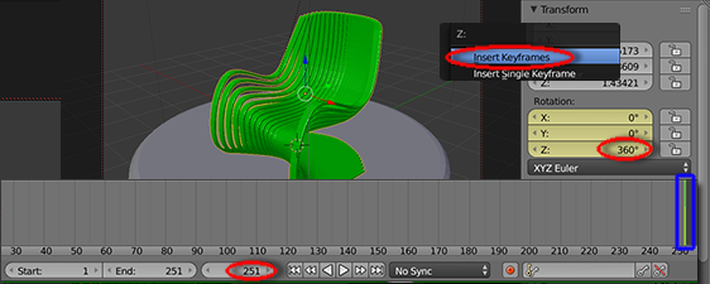
In Timeline panel, goto the last frame, 251 and apply a rotation Z-360 degrees and insert another keyframe.
You can play the animation to check the result.
You can play the animation to check the result.
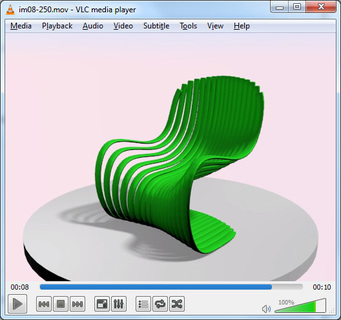
Render your animation to a H.264 movie
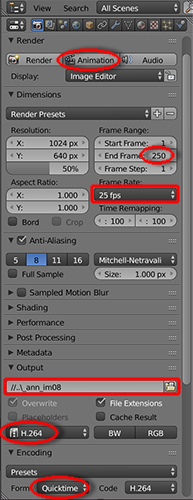
In the Camera window, change the "End Frame" to "250" (to achieve a loopable animation).
Input your output path under "output" and assign a name for your animation movie (I call it xxx_im08 as an example here).
Under "Output", change the codec to "H.264", and under "Encoding", choose "Quicktime".
Once all setting are done, save your scene once more and click the button "Animation" at the top of Camera panel. You then can see your movie file in the output folder. Pls. check out my example as a reference.
In-Class Exercise:
Prepare your Turntable Animation and perhaps use a few screen captures to demonstrate your production process inside Blender.
Prepare your Turntable Animation and perhaps use a few screen captures to demonstrate your production process inside Blender.
|
Studio & Tutorial:
Prepare in advance your presentation and do explain your creative ideas and the final design to impress the judges. Wish you all good luck in the competition and may Blender be one of your helpful tools for your future 3D projects! |
|
Prepared by Ann/y Leung (Open Education Evangelist and Founder of OSMM.HK)
Useful websites to learn Blender:
Official tutorials - http://www.blender.org/support/tutorials/
Official Manual - http://www.blender.org/manual
BornCG Channel - https://www.youtube.com/user/cgboorman
Blender Cookie - https://cgcookie.com/blender/
Official tutorials - http://www.blender.org/support/tutorials/
Official Manual - http://www.blender.org/manual
BornCG Channel - https://www.youtube.com/user/cgboorman
Blender Cookie - https://cgcookie.com/blender/
