
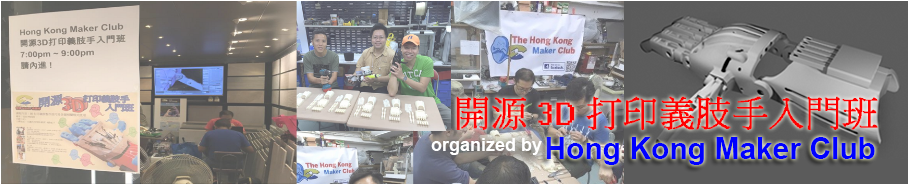
開源3D打印義肢手入門班 is a collaborative workshop organized by the Hong Kong Maker Club (as on 23/July/2016)
Workshop Contents:
1. Blender Interface and basic features 2. Basic shortcut keys and navigation 3. Import background image 4. Ruler tools and Units setup 5. Import .stl model file 6. Fix non-manifold with netFabb feature 7. Preview .stl online 8. Export .stl for 3D printing |
|
|
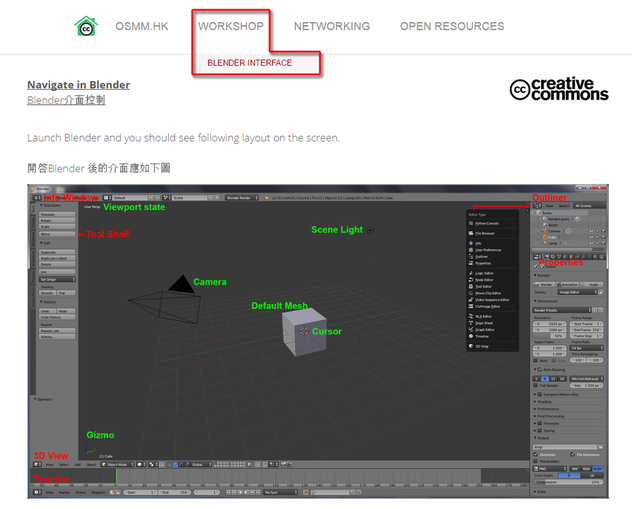
1). Learn the basic interface & navigation
Notes and useful materials are available in the "Blender Interface" page. |
|
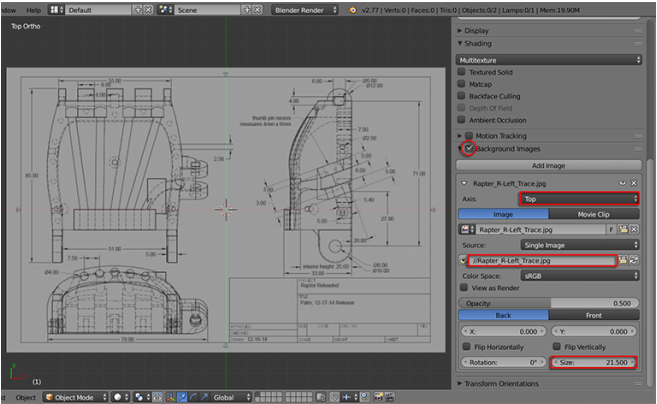
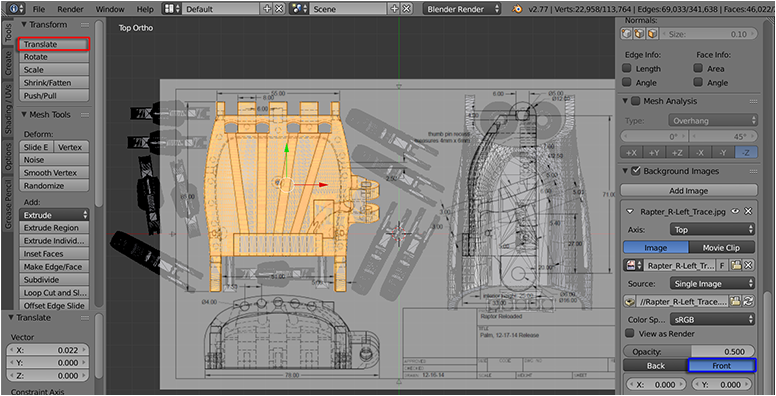
2). Import Background Image
Click here to download the "Rapter_R-Left_Trace.jpg"
In 3D View's Property window, check "Background Images" and choose "Top" from Axis.
Under Source:, click the folder icon and load up the image on screen.
Lastly, input "21.5" as the size to zoom image in right scale.
Click here to download the "Rapter_R-Left_Trace.jpg"
In 3D View's Property window, check "Background Images" and choose "Top" from Axis.
Under Source:, click the folder icon and load up the image on screen.
Lastly, input "21.5" as the size to zoom image in right scale.
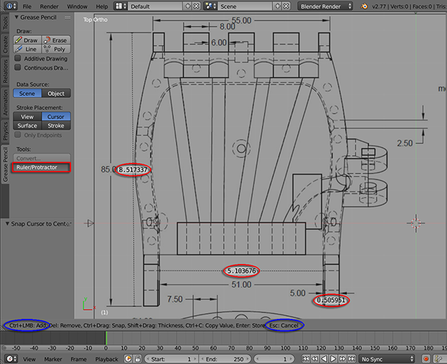
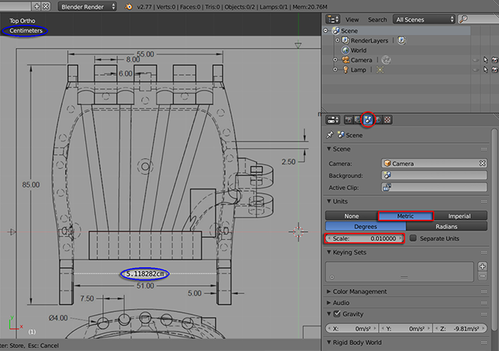
3). Use Ruler and set unit to 'Centimeters'
Inside "Tool Shelf", goto "Grease Pencil" and click "Ruler/Protractor" under Tools. LMB+Click and Drag to see the measurement. Hold Ctrl+LMB Click and Drag again to apple multiple measurements (*the measurements match with the diagram).
To set units. Inside Blender's Property window, click "Scene" tab and under Units, click "Metric" and input" 0.01" to set units to Centimeters. You now see "cm" is displayed.
|
|
|
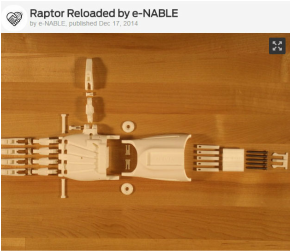
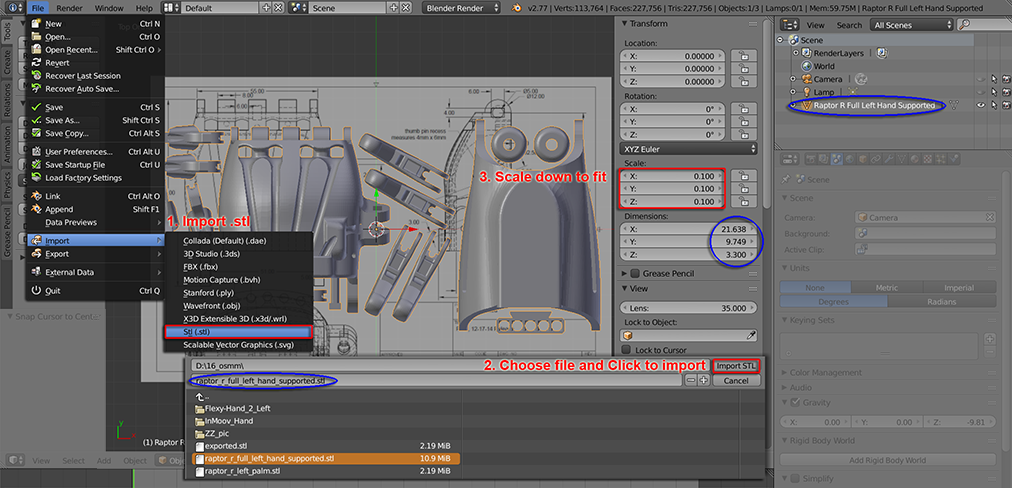
4). Import .stl into the scene
Download the "raptor's left hand stl" (on right hand side) or use the original "Raptor Reloaded by e-NABLE" file. 4.1). Goto File > Import > Stl. (stl). 4.2). Then, select the right .stl and click button "Import STL" to load this model into scene. 4.3). Inside 3D View's Property window, input "0.1" in all XYZ under Scale to match the diagram. 5). Lastly, "Translate" the model to align the diagram underneath |
| ||
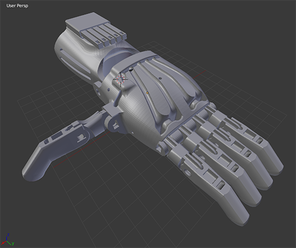
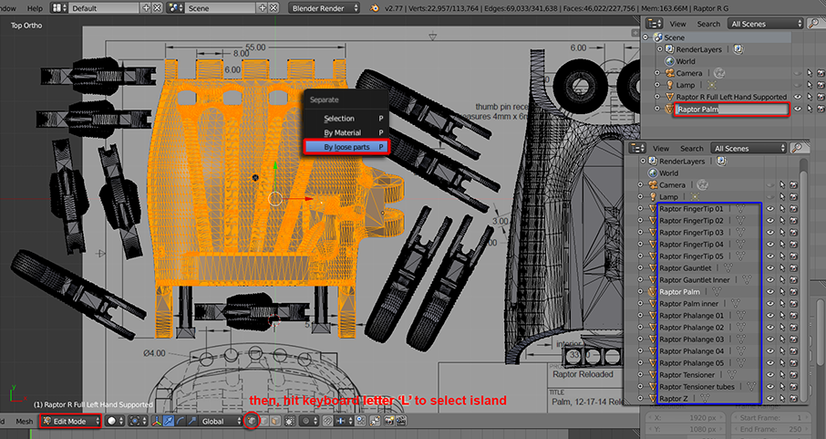
6). Separate islands from the combined .stl model
Hit "Tab" key to switch to "Edit Mode". Select a vertex from the palm component, hit "L" key to highlight all vertices (in orange colour), then hit "P" key and choose "By loose parts" to separate them all. Rename each item by clicking it's name inside Outliner and input the new name. Repeat to rename all key components from the .stl geometry.
Hit "Tab" key to switch to "Edit Mode". Select a vertex from the palm component, hit "L" key to highlight all vertices (in orange colour), then hit "P" key and choose "By loose parts" to separate them all. Rename each item by clicking it's name inside Outliner and input the new name. Repeat to rename all key components from the .stl geometry.
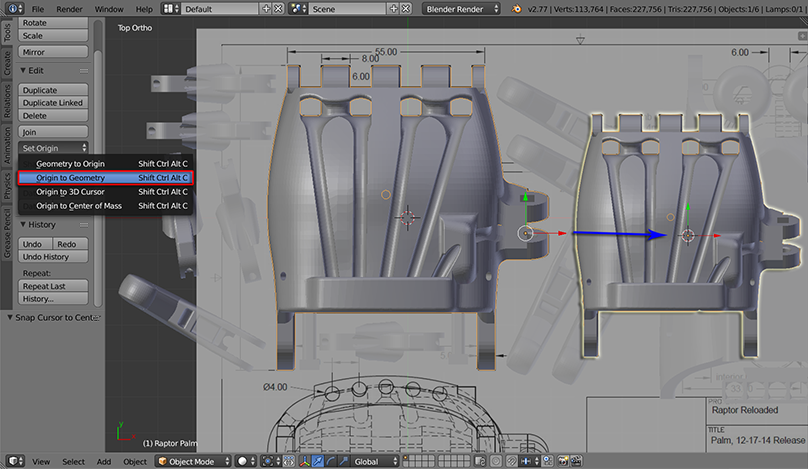
7). Set Origin
Switch back to "Object Mode". Only select the "Palm" geometry, inside Tool box, goto "Set Origin" and choose "Origin to Geometry" (Origin will be moved to the center of the geometry). Do the same to all geometry items (*only those you need to resize them later)
Switch back to "Object Mode". Only select the "Palm" geometry, inside Tool box, goto "Set Origin" and choose "Origin to Geometry" (Origin will be moved to the center of the geometry). Do the same to all geometry items (*only those you need to resize them later)
|
8). Reassemble the prosthetic hand
Use "Transformation tools" inside "Tool Shelf" to place all geometries into correct position. You'd download the "0529_raptorreloaded.blend" file on the right if needed. |
| ||

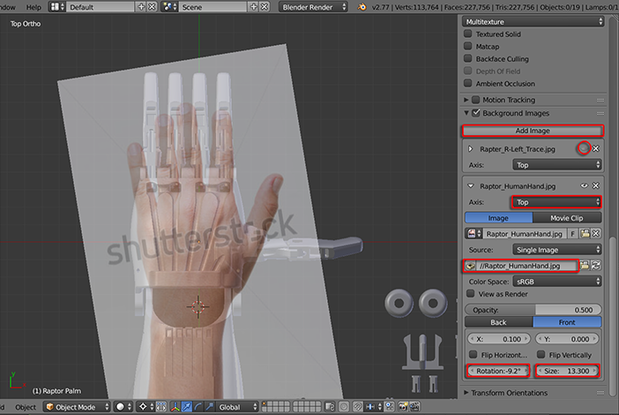
9). Load your hand image to see the proportion. *You can "Rotate" and "Re-Size" the image fitting your scene.
Use transformation tools to fit the corresponding geometry with your hand (*you might need to use "Edit Mode")
This process would take a long time and you need to be patient!
10). Once done, reposition geometries alike original imported .stl to optimize for 3DP. Make sure you re-scale the model to "1.0" in Scale (reverse step of 4.3)
11). Select all individual geometries and hit "Ctrl + J" keys to merge them into one single geometry.
12). Check watertight geometry or use either netFabb+3D Builder or MakePrintable tools to repair:
Change to "Edit Mode", highlight all vertices first, use "Remove Doubles" to delete duplicated ones. Then unselect all vertices,
press "Shift+Ctrl+Alt M" keys together to call the feature and Blender would highlight all the non-watertight edges if the scene has any "non-manifold" parts (alike the highlighted parts from my demo scene).
Fix all the problematic parts by either:-
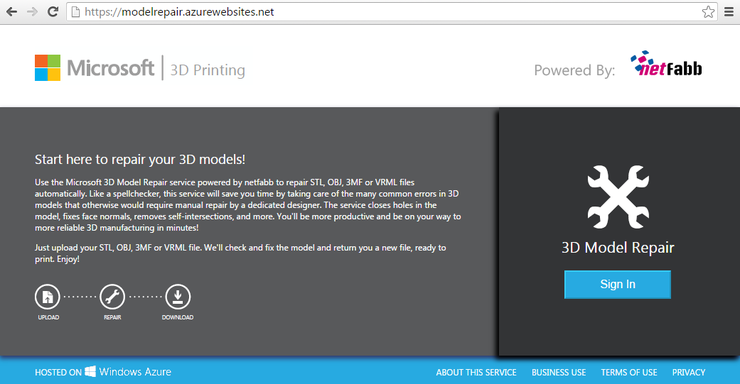
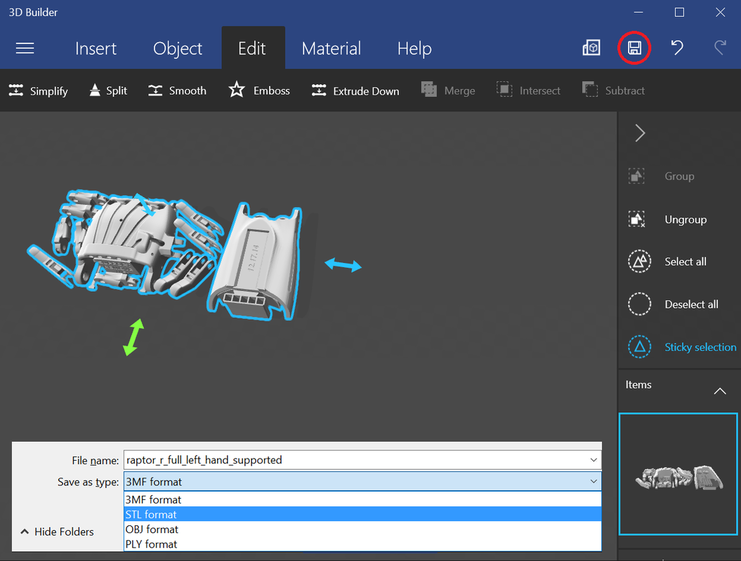
Use Free netFabb repairing tool by clicking https://modelrepair.azurewebsites.net/ (need to sign in with a Microsoft email). Then use 3D Builder (comes with Windows 10) to save from .3mf to .stl alike the second image underneath.
Change to "Edit Mode", highlight all vertices first, use "Remove Doubles" to delete duplicated ones. Then unselect all vertices,
press "Shift+Ctrl+Alt M" keys together to call the feature and Blender would highlight all the non-watertight edges if the scene has any "non-manifold" parts (alike the highlighted parts from my demo scene).
Fix all the problematic parts by either:-
- merger overlapped vertices/edges
- use "make face" feature to fill all gaps
- scale up all stripes to 3mm the least (though some printers can handle 2mm thickness)
Use Free netFabb repairing tool by clicking https://modelrepair.azurewebsites.net/ (need to sign in with a Microsoft email). Then use 3D Builder (comes with Windows 10) to save from .3mf to .stl alike the second image underneath.
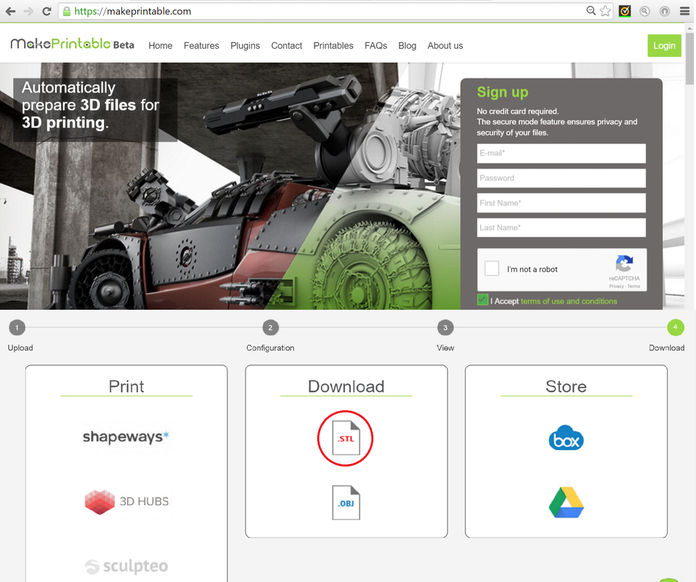
For MAC user, click MakePrintable to launch and sign up creating a free account. Then choose ".stl" before download. (integrated with Thingiverse and 3DHubs as their free repair tool)
Preview with FREE online tools
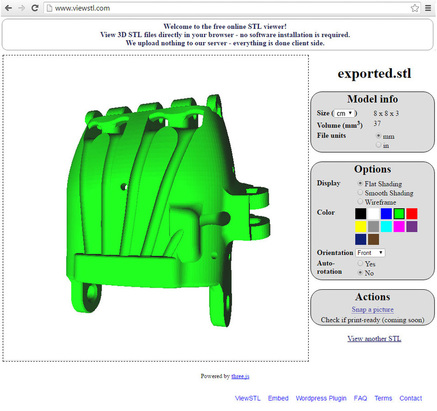
You can preview your final .stl with this interactive viewstl.com (alike the screencap image on the left) at http://www.viewstl.com/
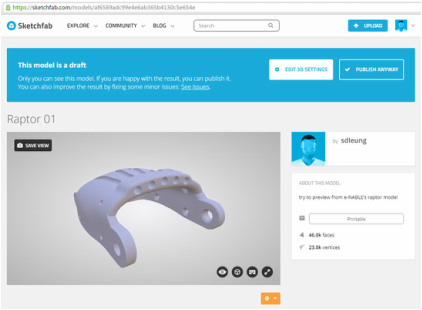
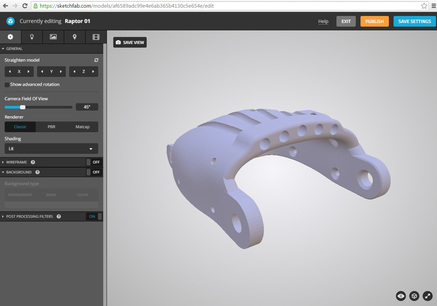
Or create an account at Sketchfab (alike the two screencap images at bottom) to preview and/or share your model
You can preview your final .stl with this interactive viewstl.com (alike the screencap image on the left) at http://www.viewstl.com/
Or create an account at Sketchfab (alike the two screencap images at bottom) to preview and/or share your model
|
|
More References:
To learn the 3D Printing Toolbox from Blender's official manual:-
https://wiki.blender.org/index.php/Extensions:2.6/Py/Scripts/Modeling/PrintToolbox
A tutorial from Shapeways at http://www.shapeways.com/tutorials/prepping_blender_files_for_3d_printing
How to fix non-manifold model from Shapeways (with video) at http://www.shapeways.com/tutorials/fixing-non-manifold-models
YouTube movies from "The 3D Printing Ninja" to fix all types of non-manifold model at https://www.youtube.com/playlist?list=PLz9OXdtkwa5Ve10xf_-dSgLpIhv3VDWJ-
Prepared by Ann/y Leung (Open Education Evangelist and Founder of OSMM.HK)
Acknowledgements to the e-NABLE community for their "Raptor Reloaded" files we downloaded at the Thingiverse: http://www.thingiverse.com/thing:596966 and the Hong Kong Maker Club
Acknowledgements to the e-NABLE community for their "Raptor Reloaded" files we downloaded at the Thingiverse: http://www.thingiverse.com/thing:596966 and the Hong Kong Maker Club
Useful websites to learn Blender:
Official tutorials - http://www.blender.org/support/tutorials/
Official Manual - http://www.blender.org/manual
BornCG Channel - https://www.youtube.com/user/cgboorman
Blender Cookie - https://cgcookie.com/blender/
Official tutorials - http://www.blender.org/support/tutorials/
Official Manual - http://www.blender.org/manual
BornCG Channel - https://www.youtube.com/user/cgboorman
Blender Cookie - https://cgcookie.com/blender/
