
|
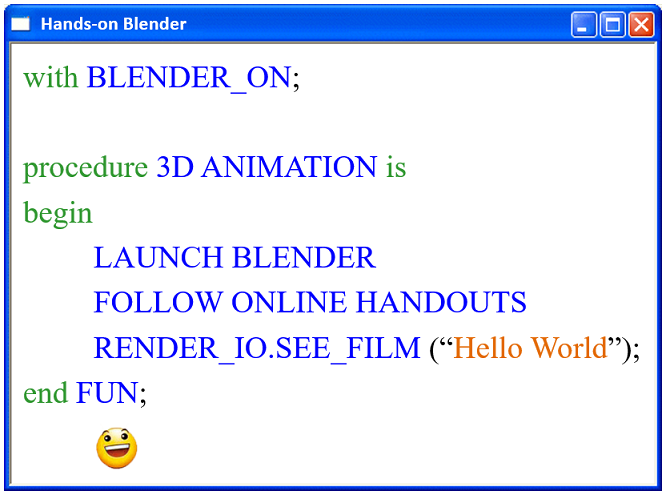
3D Computer Animation Crash Course
|
|
|
|
Acknowledgements
Special Thanks to SITCON x HK 2018

Blender Interface
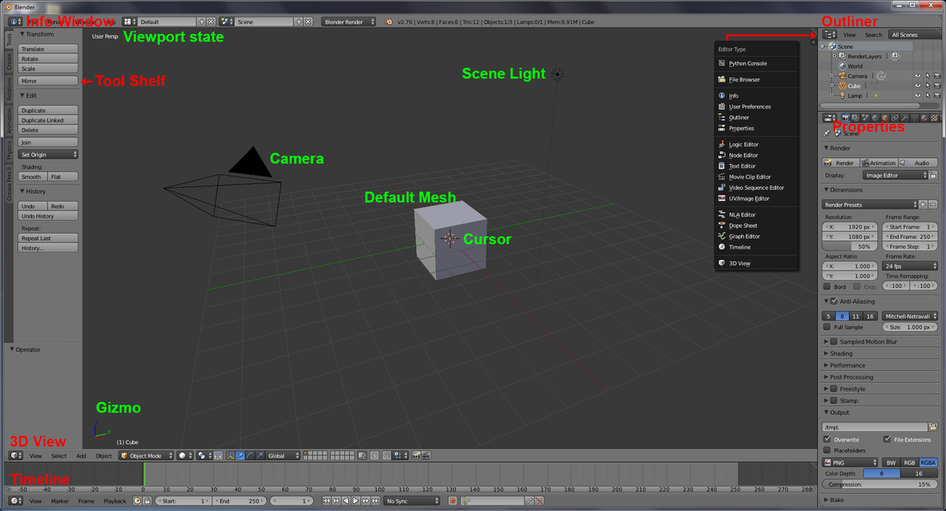
Launch Blender and you should see following layout on the screen.
開啓Blender 後的介面應如下圖
開啓Blender 後的介面應如下圖

Middle Mouse (MM) & Drag – orbit the scene
Mouse wheel / Ctrl+MM Drag – zoom in the scene
Sht+MM Drag – pan the scene
Left Mouse (LM) & Click to locate the cursor
Right Mouse (RM) Click to select scene object. Hold 'Shift' to multi-select or toggle selection
A key (in following, I would skip the word "key") to select all or unselect all
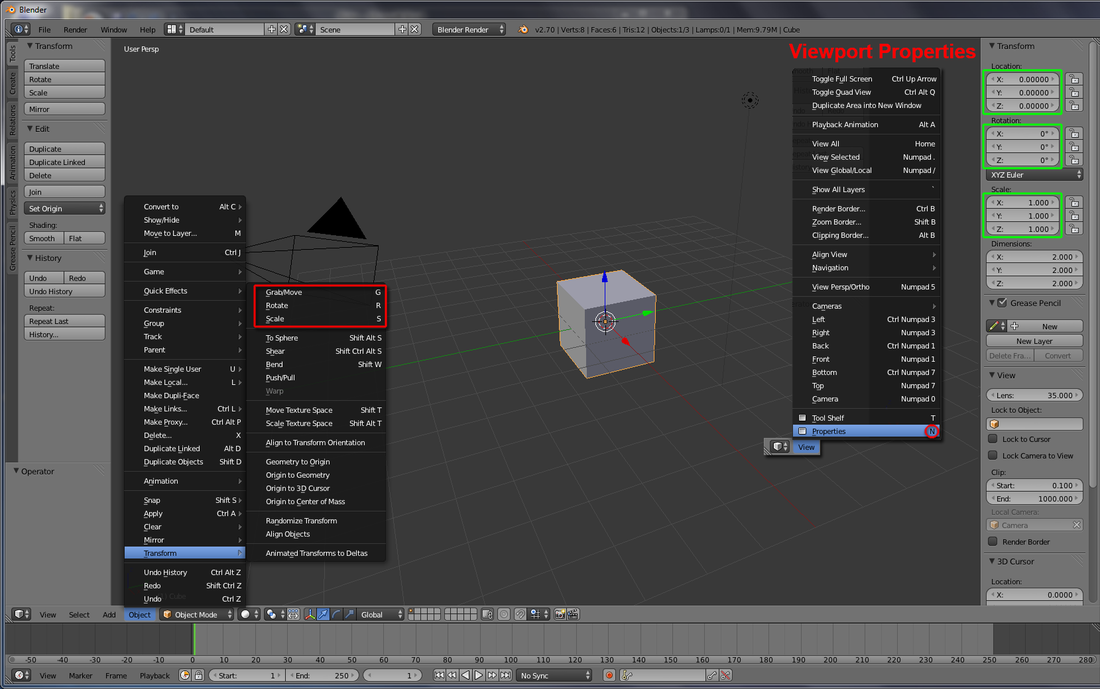
G to Move, R to Rotate, and S to Scale the selected mesh (N to launch '3D Viewport' Properties panel to read transformation information)
按住滑鼠中鍵-轉動畫面。
滑鼠滾輪 / Ctrl+按住滑鼠中鍵-放大縮小。
Shift+按住滑鼠中鍵-平移畫面。
左擊決定3D cursor位置。右擊選擇畫面內物件(按住Shift可多選/取消選擇物件)
A 鍵全選或取消全選
選取物件後,按G鍵為移動,R鍵為旋轉,S鍵為放大縮小該物件(N鍵可喚出物件詳細資料面版,查看比例變形及單位)
Mouse wheel / Ctrl+MM Drag – zoom in the scene
Sht+MM Drag – pan the scene
Left Mouse (LM) & Click to locate the cursor
Right Mouse (RM) Click to select scene object. Hold 'Shift' to multi-select or toggle selection
A key (in following, I would skip the word "key") to select all or unselect all
G to Move, R to Rotate, and S to Scale the selected mesh (N to launch '3D Viewport' Properties panel to read transformation information)
按住滑鼠中鍵-轉動畫面。
滑鼠滾輪 / Ctrl+按住滑鼠中鍵-放大縮小。
Shift+按住滑鼠中鍵-平移畫面。
左擊決定3D cursor位置。右擊選擇畫面內物件(按住Shift可多選/取消選擇物件)
A 鍵全選或取消全選
選取物件後,按G鍵為移動,R鍵為旋轉,S鍵為放大縮小該物件(N鍵可喚出物件詳細資料面版,查看比例變形及單位)
Hello World Animation
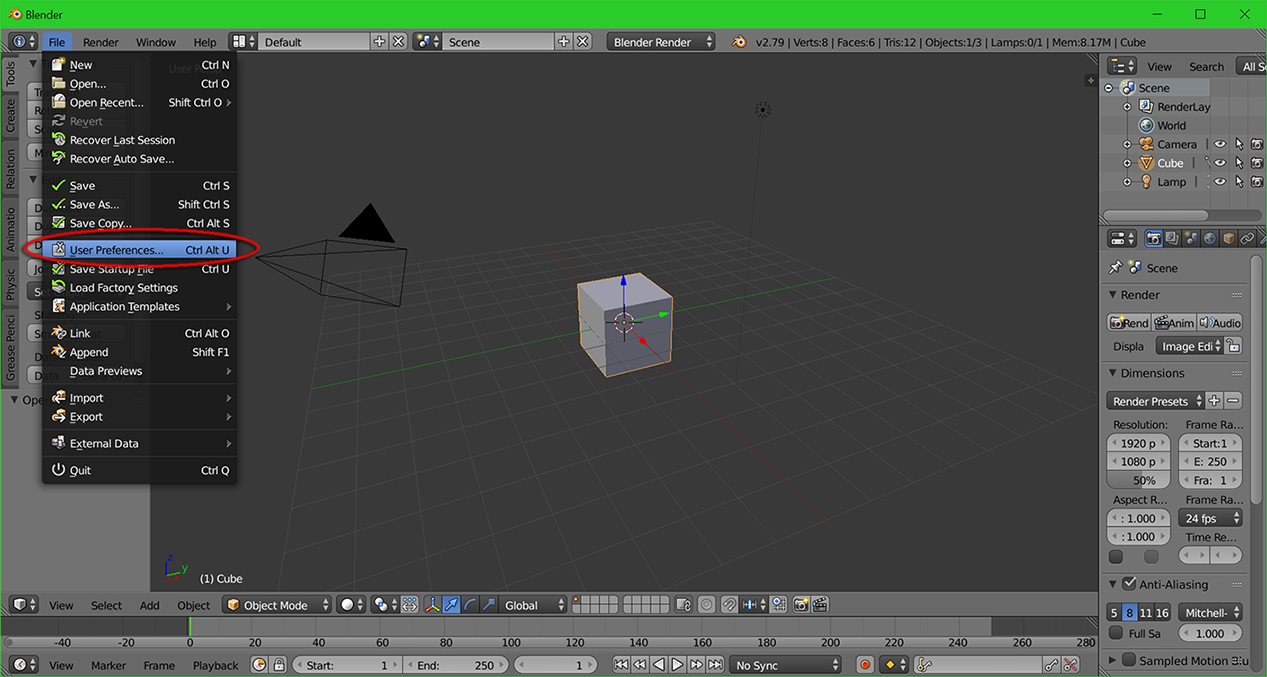
1. Goto File > User Preferences..
|
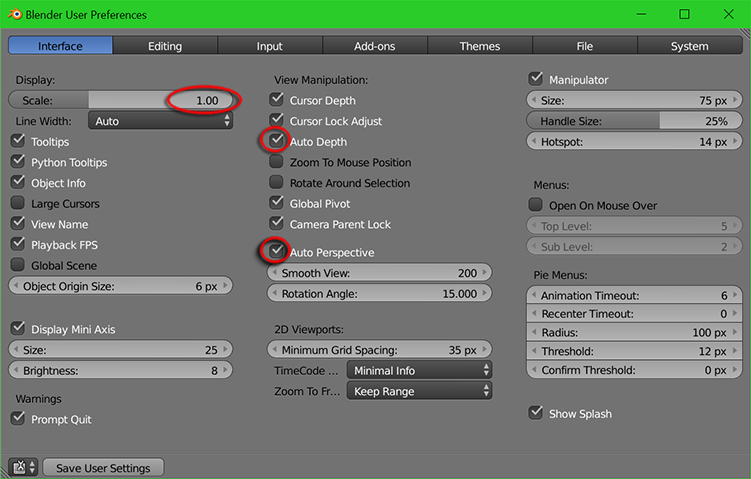
2. Goto "Interface" tab and setup accordingly
|
|
|
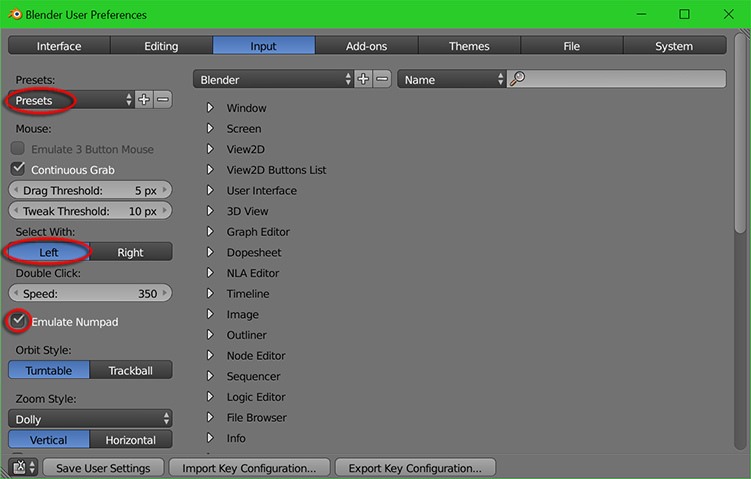
2*. Goto "Input" tab and setup accordingly
|
|
|
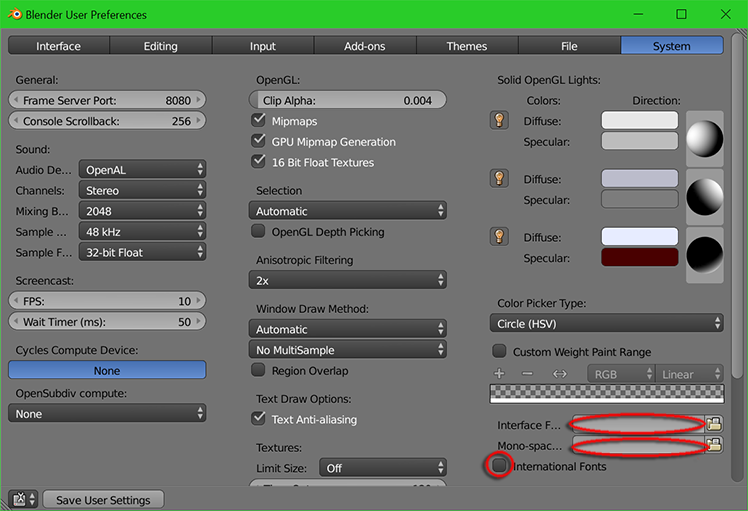
2*. Goto "System" tab and setup accordingly
|
|
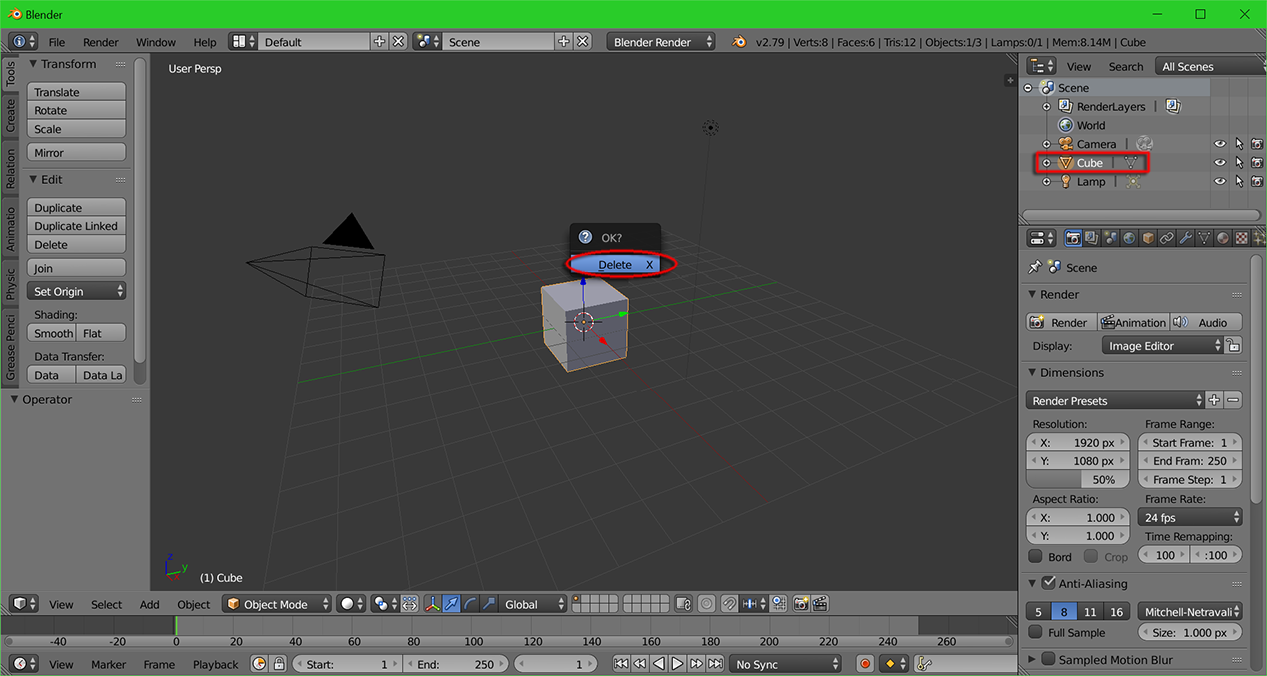
3. Select the "Cube" mesh. Hit X key or Del. key on keyboard to delete it
4. Inside the "Tool Shelf", choose "Create" tab, click Text to create a text object

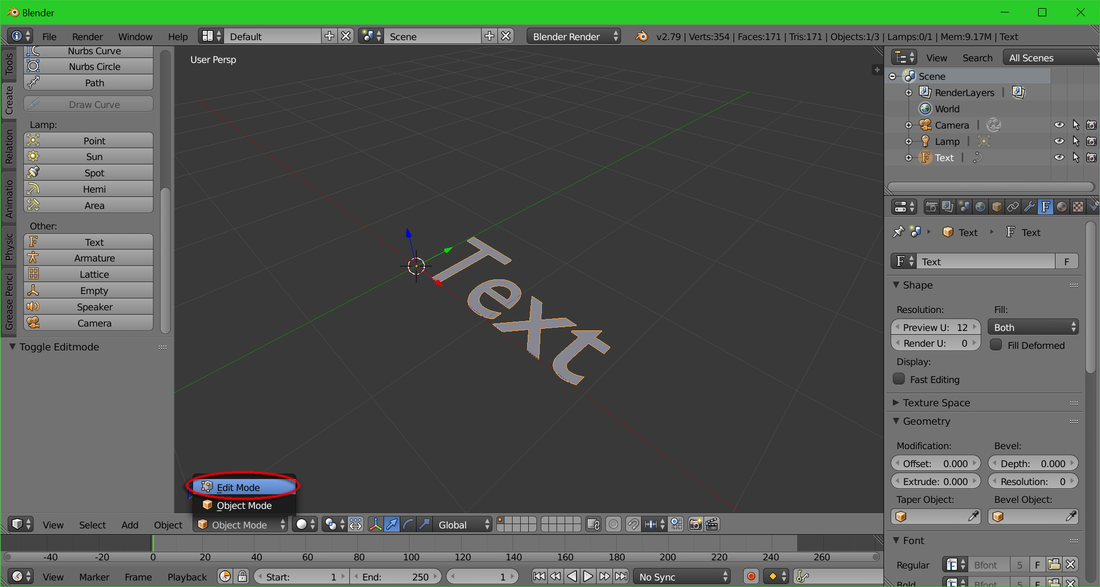
5. Switch to "Edit Mode"
|
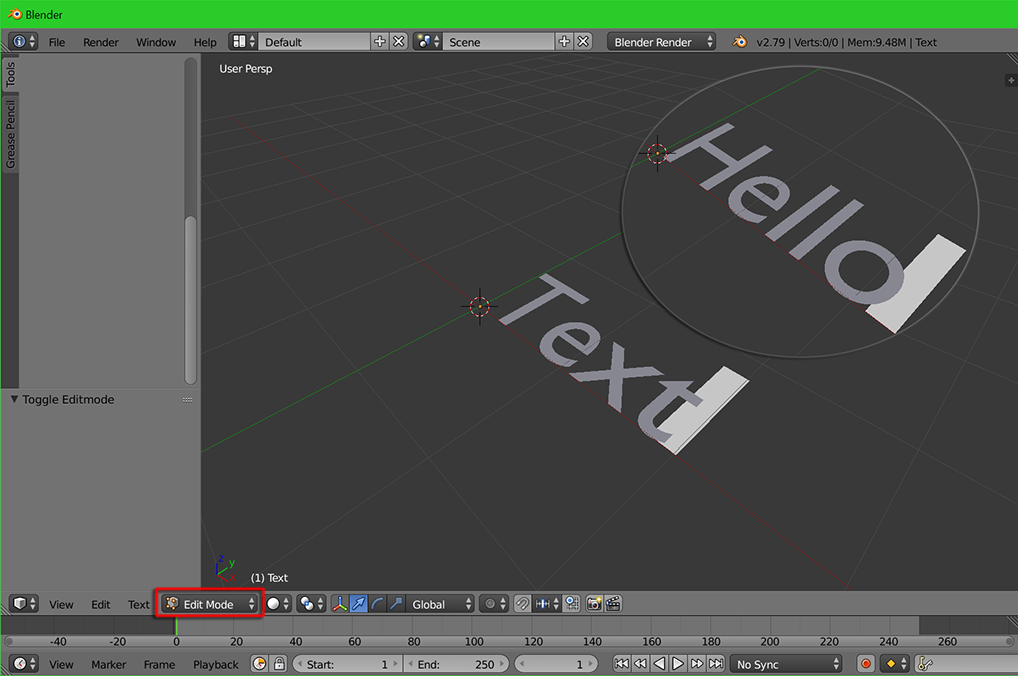
6. Use "Backspace" key to delete letters and type in "Hello"
|
|
7. Switch back to "Object Mode"

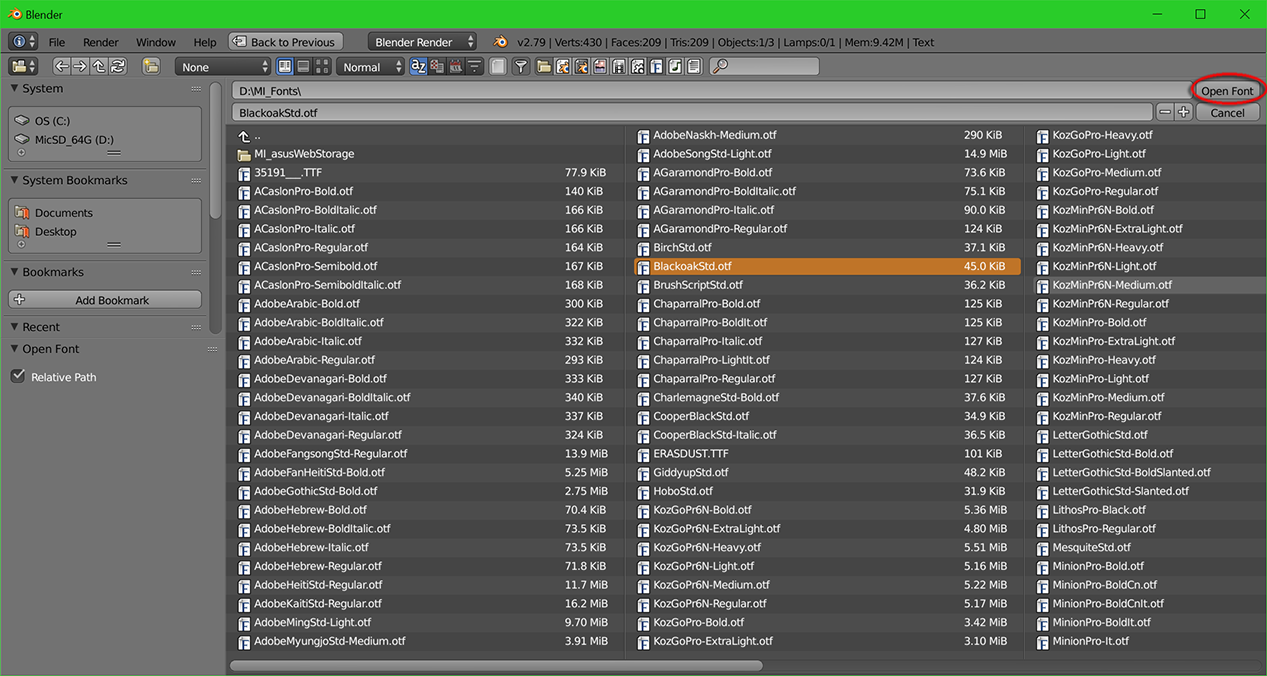
8a. Inside the "Text Data" window, click the "folder icon" to choose a font
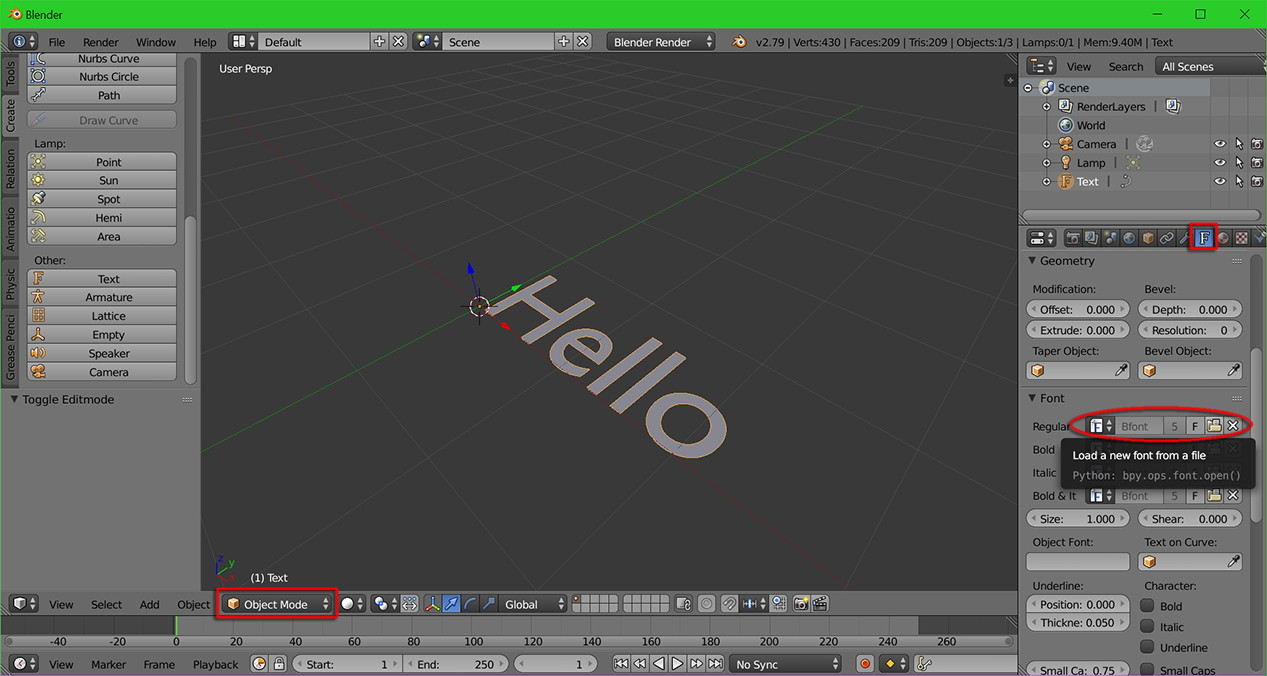
8b. Choose your font type. Then hit Open Font. You should see the new font be applied

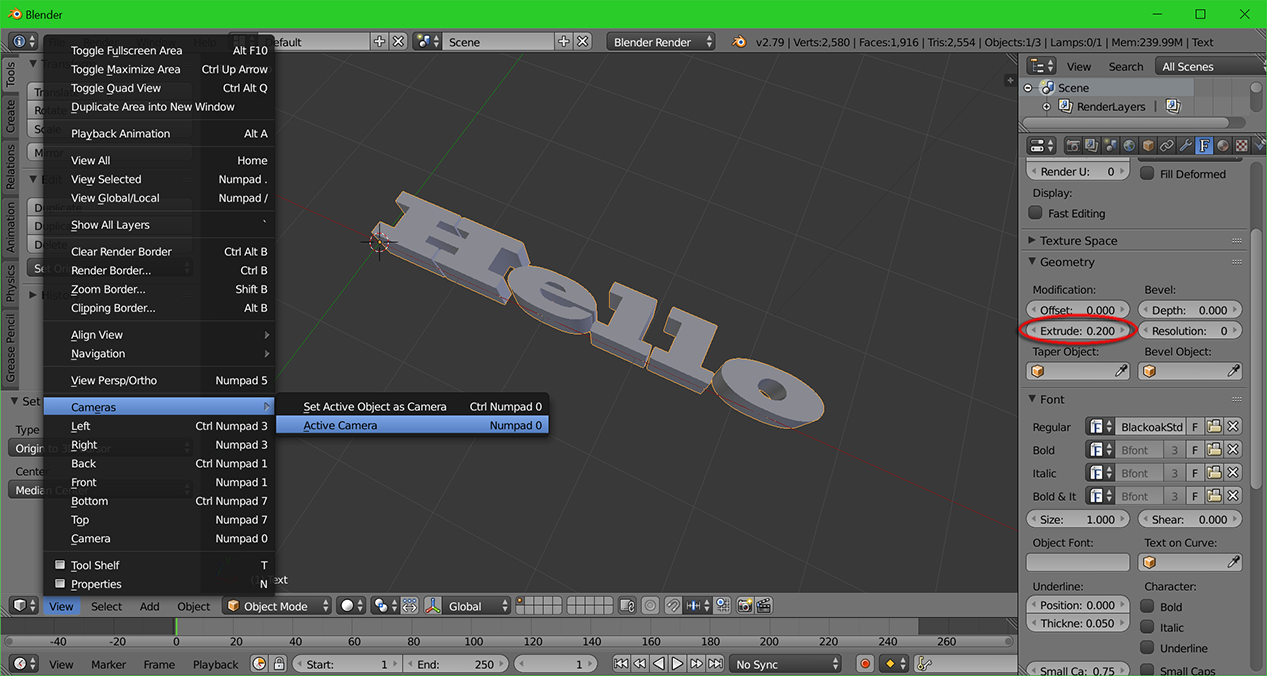
9. Firstly input "0.2" inside the Extrude parameter box. Then goto View > Camera > Active Camera to see the framing
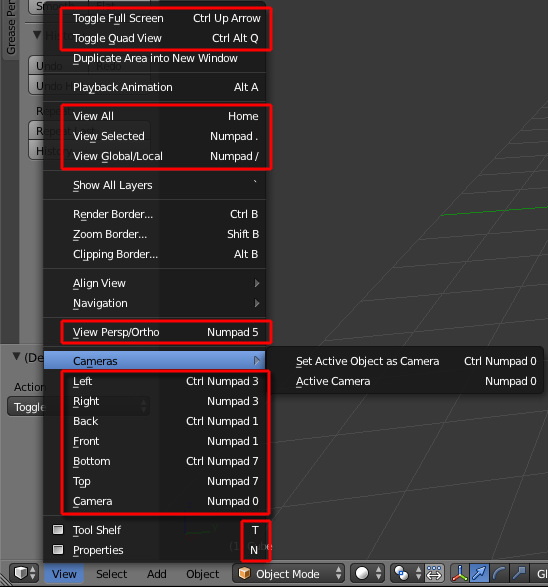
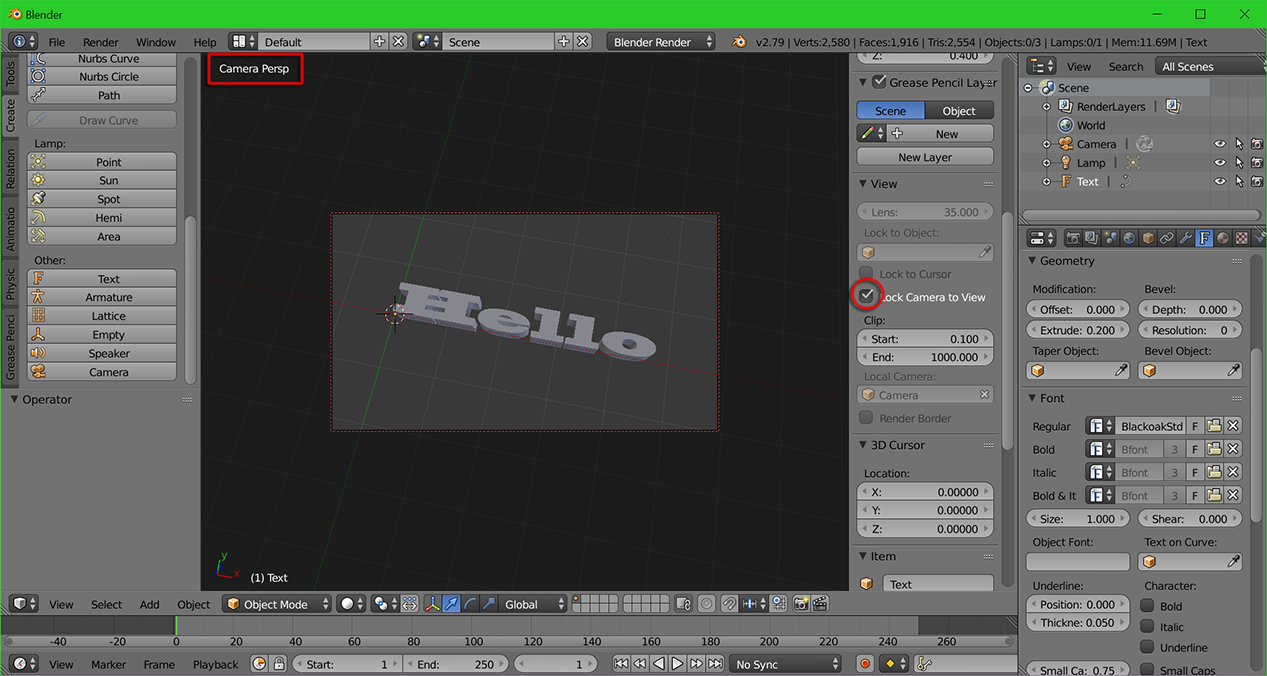
10. Beware the 3D Viewport is now in "Cam Persp" mode. Press N key to open the "Viewport Properties" Panel. Check the "Lock Camera to View" button and navigate the scene (Orbit, Pan and Zoom) to do the framing.
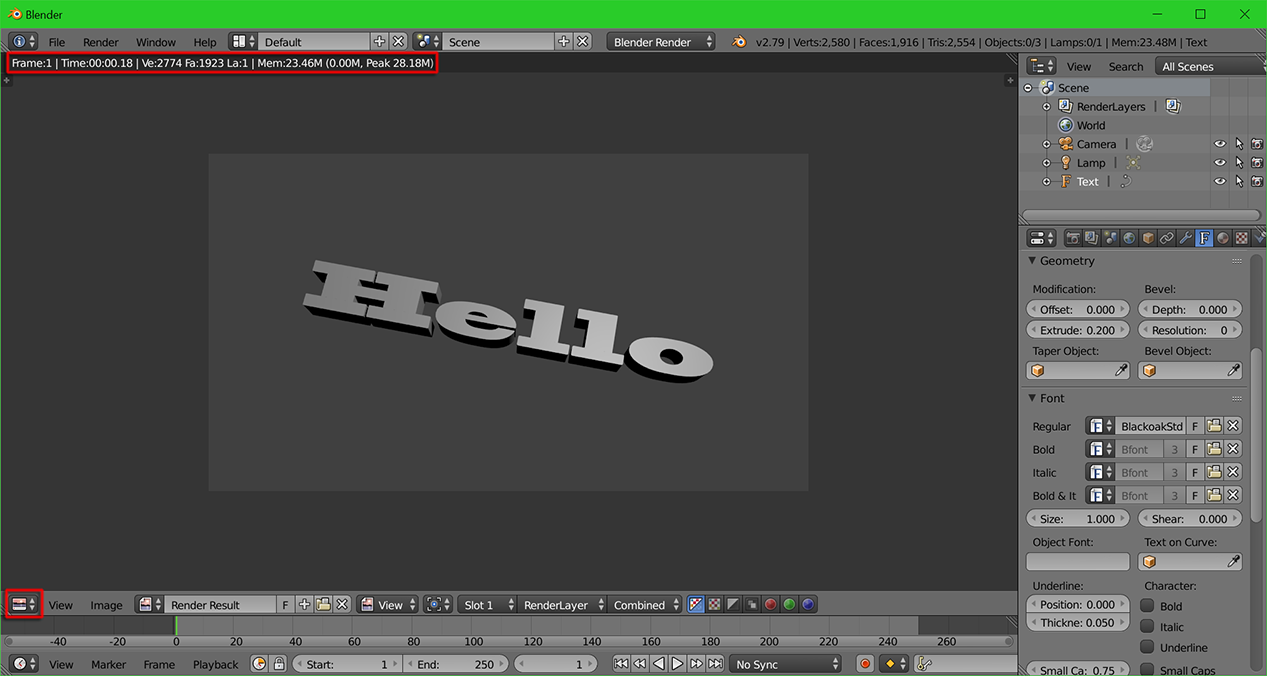
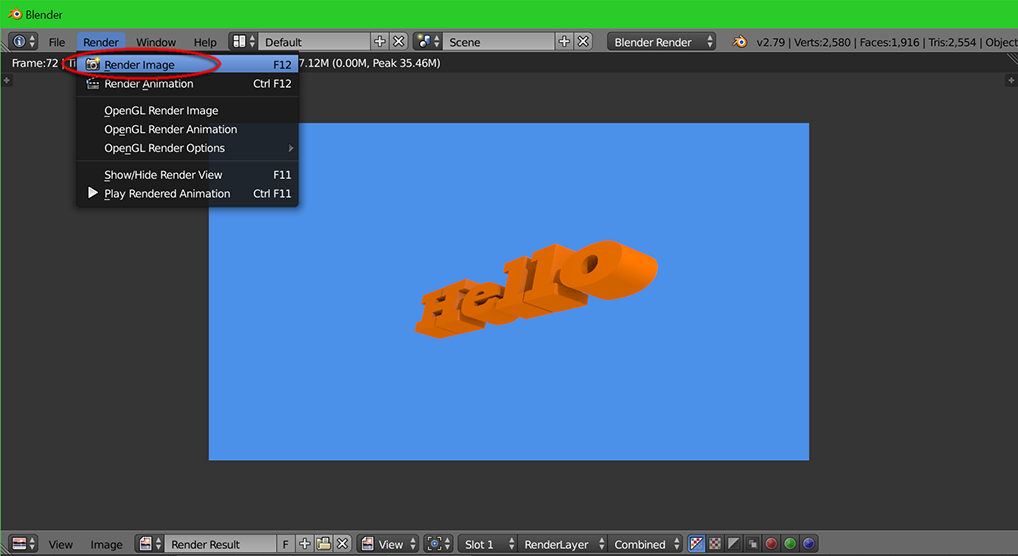
11. Hit Numpad 0 key to exit the Camera Persp mode. Goto Render > Render Image to preview the result
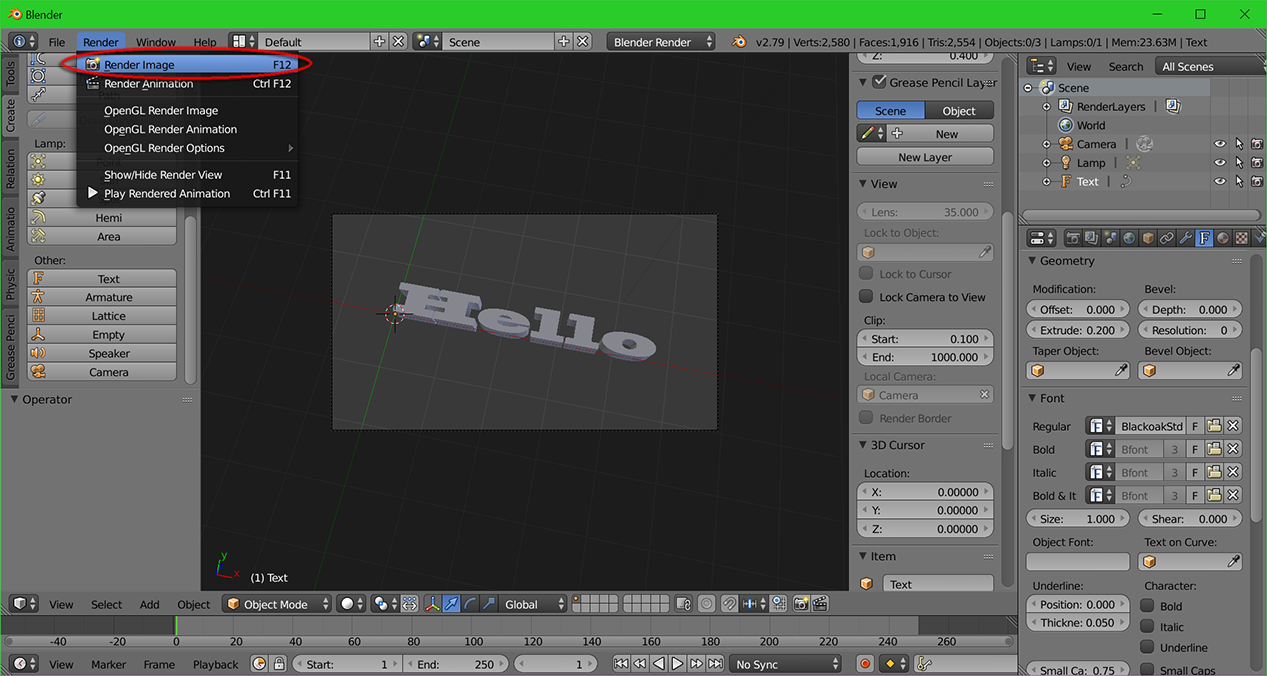
* Once the Render is completed. The viewport is switched to "UV/Image Editor" providing details about the rendering. You can hit Esc key to switch back to 3D Viewport.
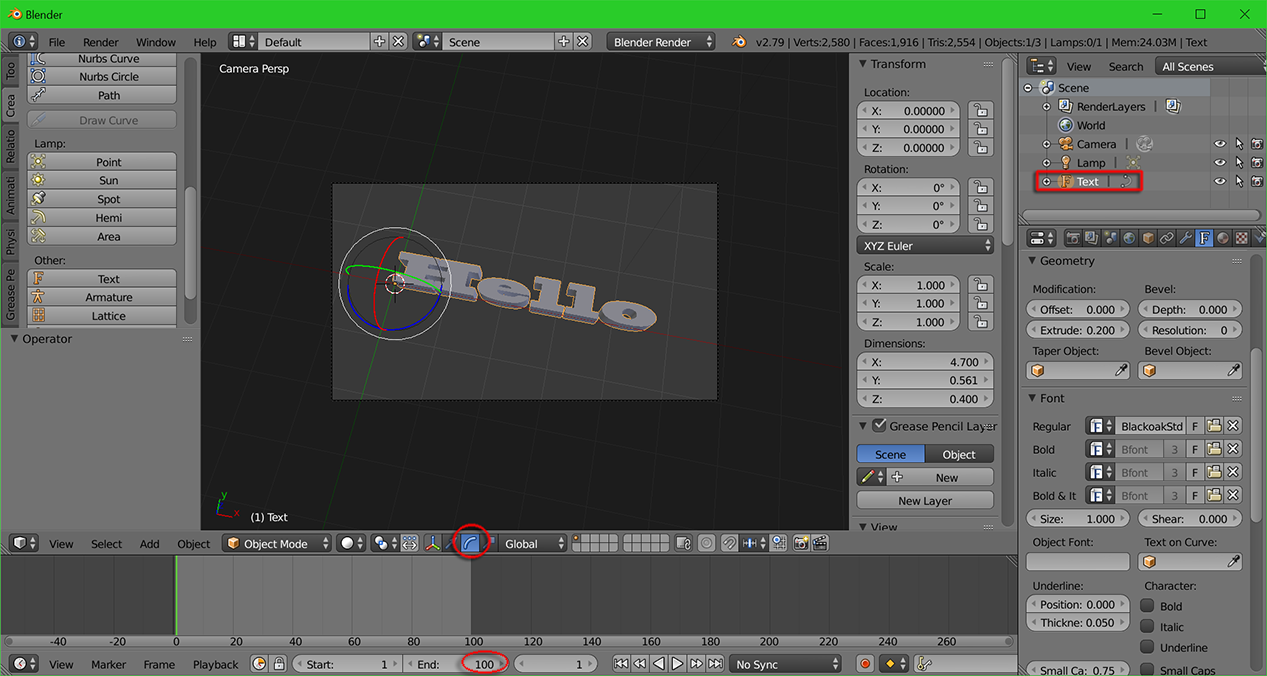
12a. Design animation and setup Origin. Turn on the Rotate Manipulator and set length for the animation film (100 frames for my demo animation)
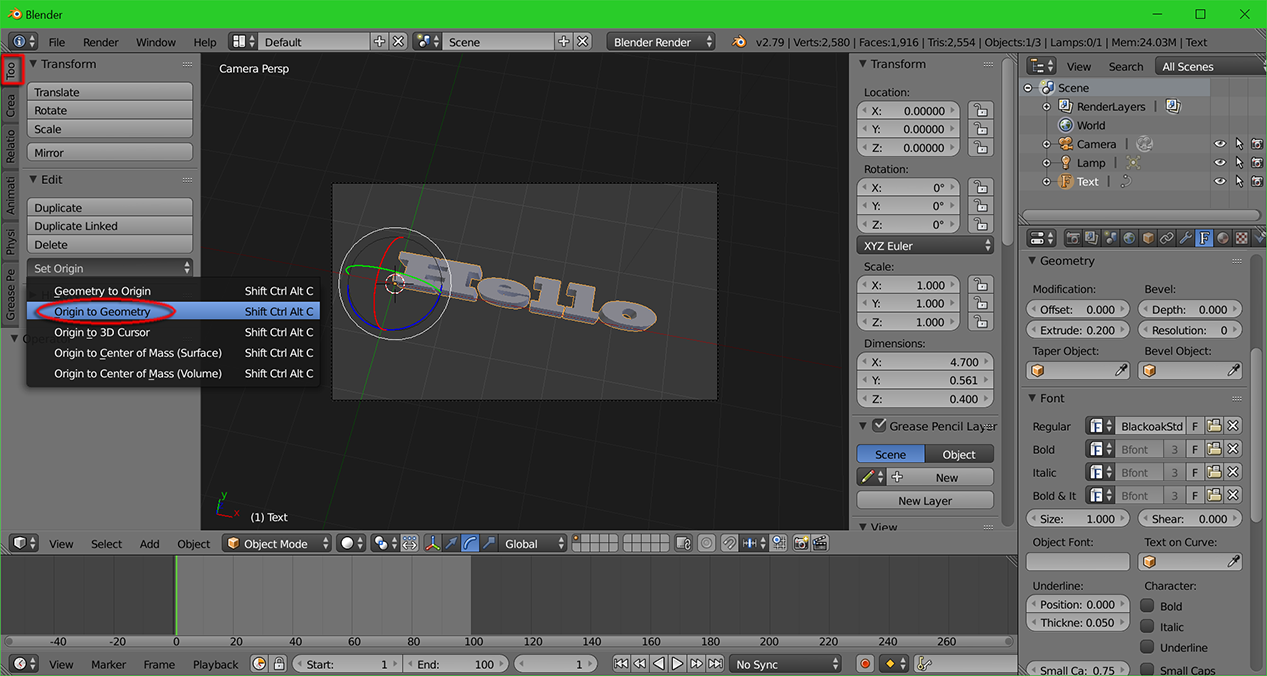
12b. Inside "Tool Shelf", goto "Tool" panel. Click "Set Origin" > Origin to Geometry
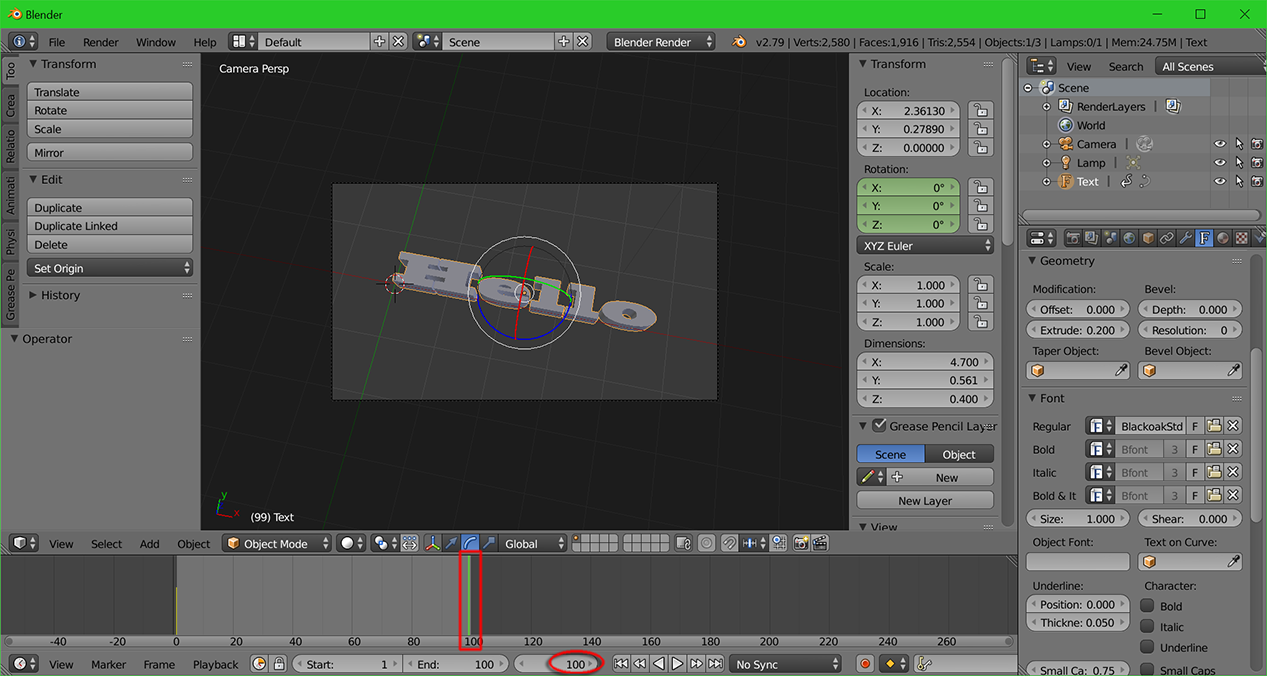
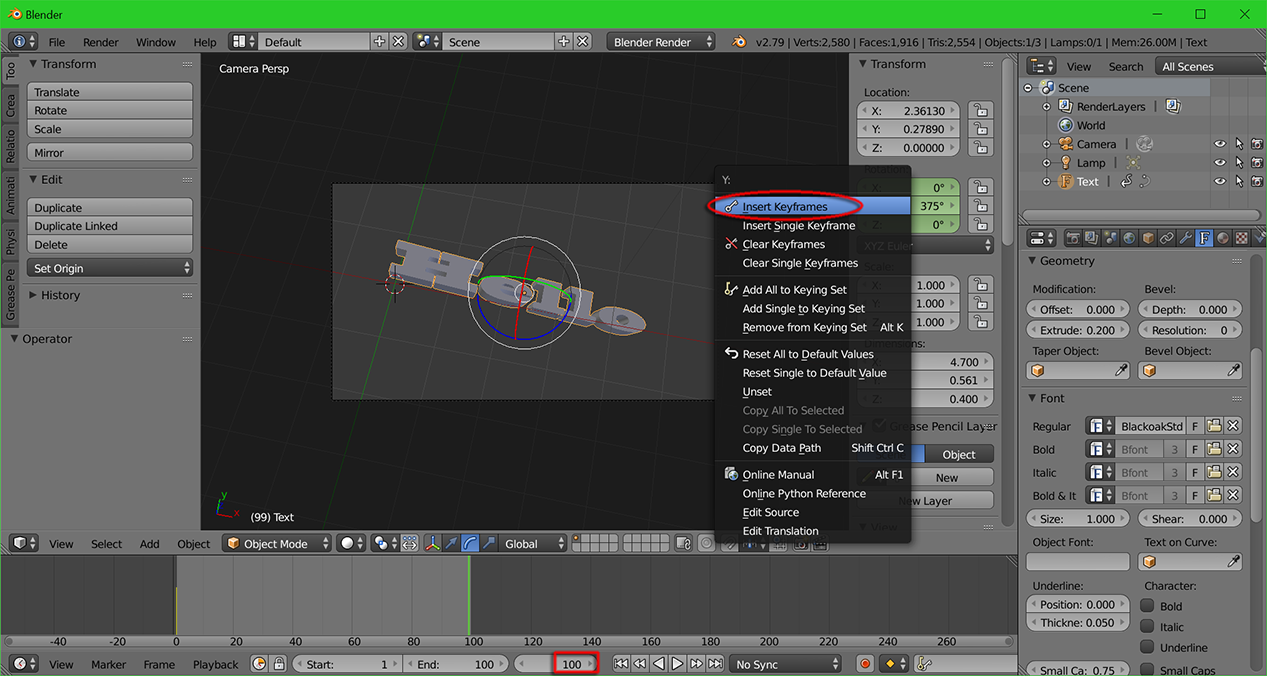
13. Make sure current frame is "1". Right-Click over the "Rotation panel" and choose Insert Keyframes from the pull-down menu
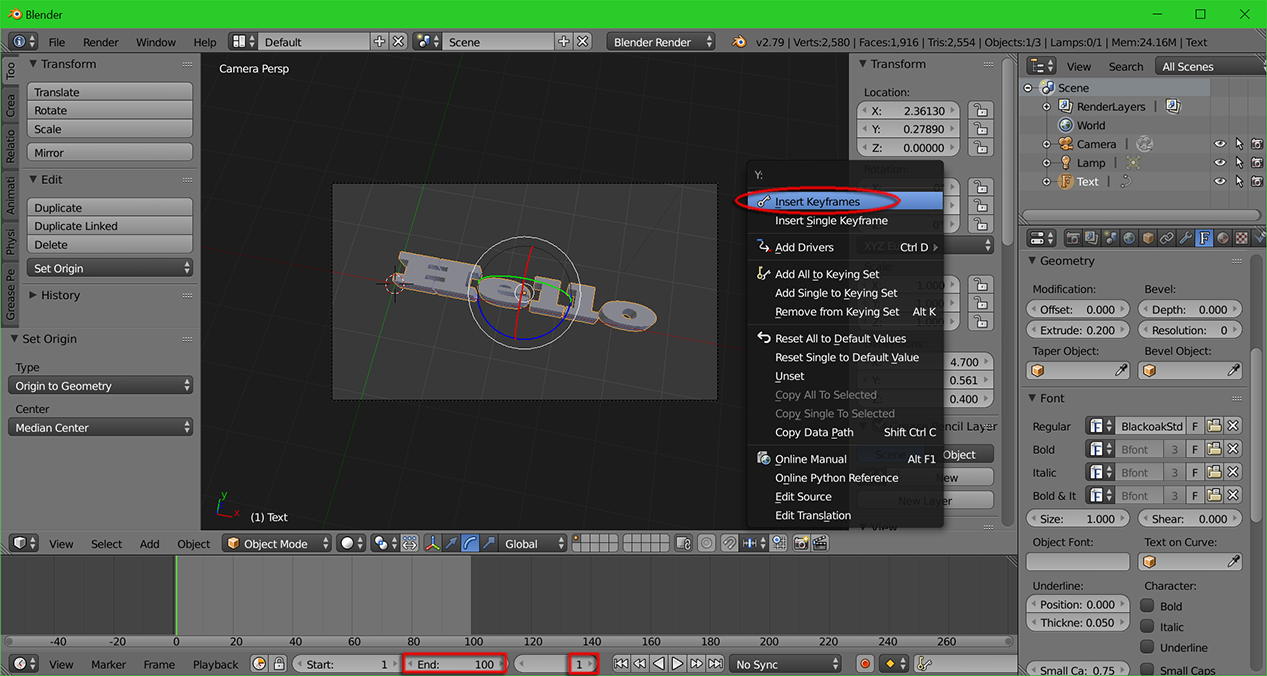

* double check the keyframe is set successfully
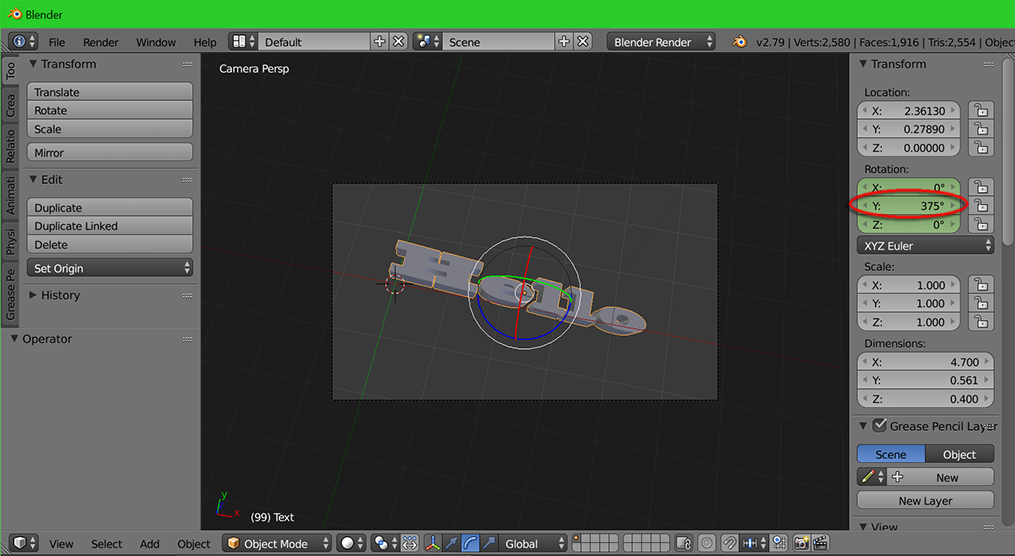
14. Goto end-frame (frame 100). Alike the following images, input new value for RY (375) and set another keyframe
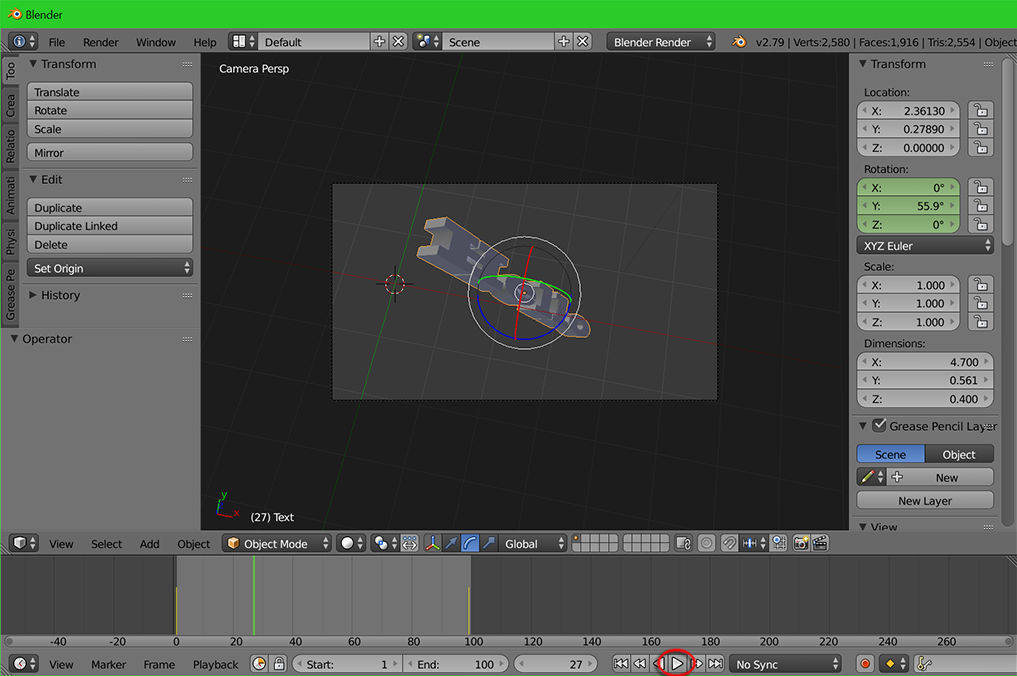
15. Play the animation from the "Timeline" panel to preview motion
16. Select the 'Hello' text obj. Inside Properties window, goto Material Panel. Press "+" icon to create a new node and then hit "+ New" button to create a material shader
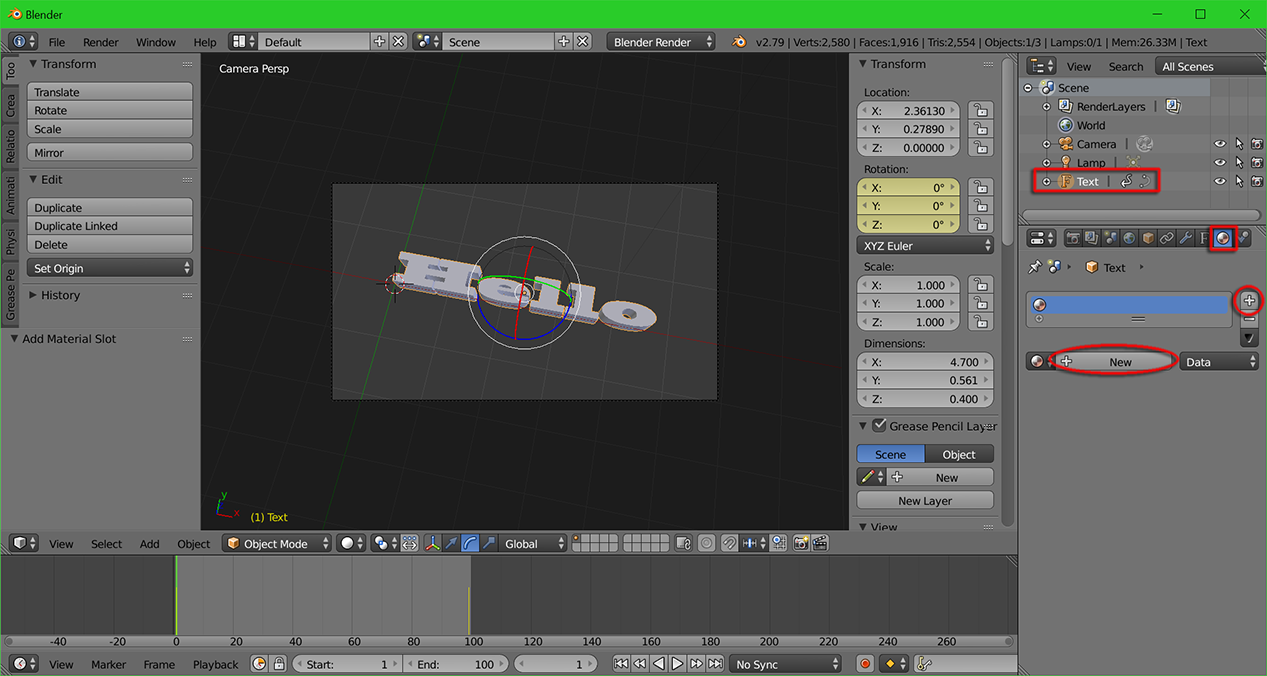
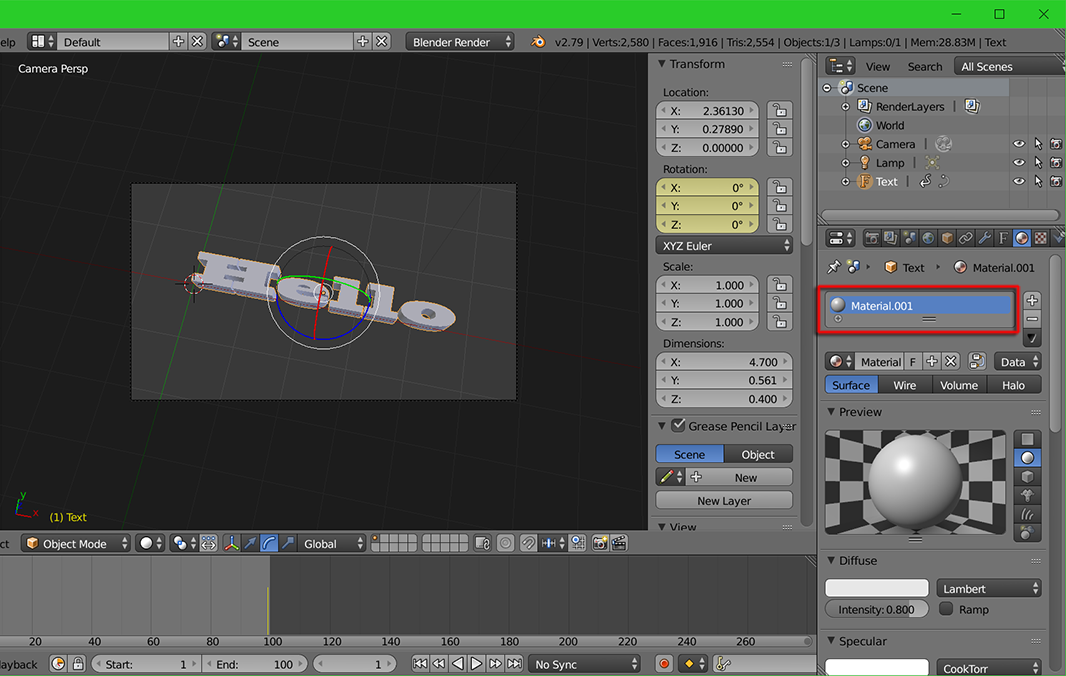
* You should now see the newly "Material.001" shader is created
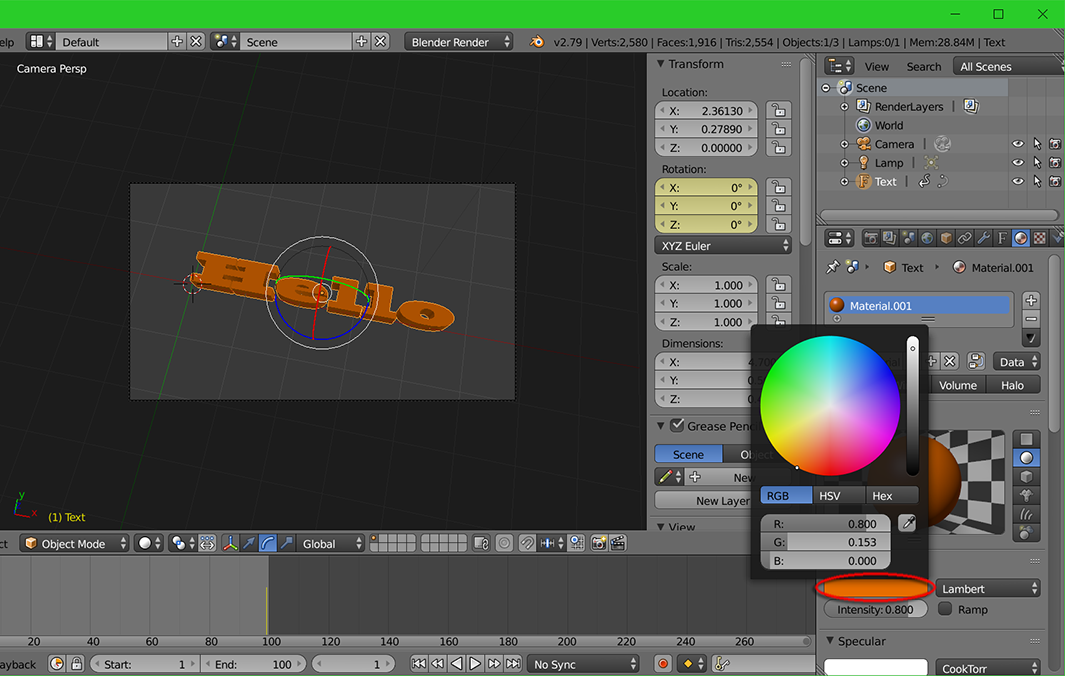
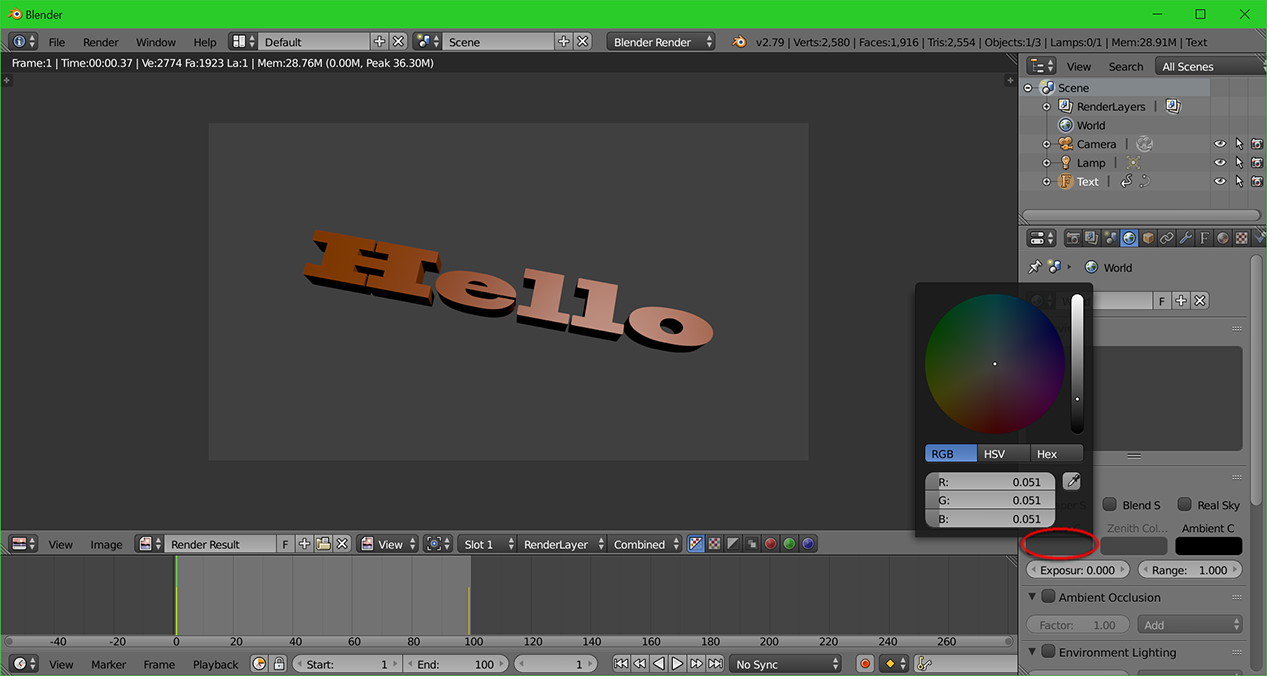
17. Click on the white Diffuse box and choose a colour. You should then see the result on screen
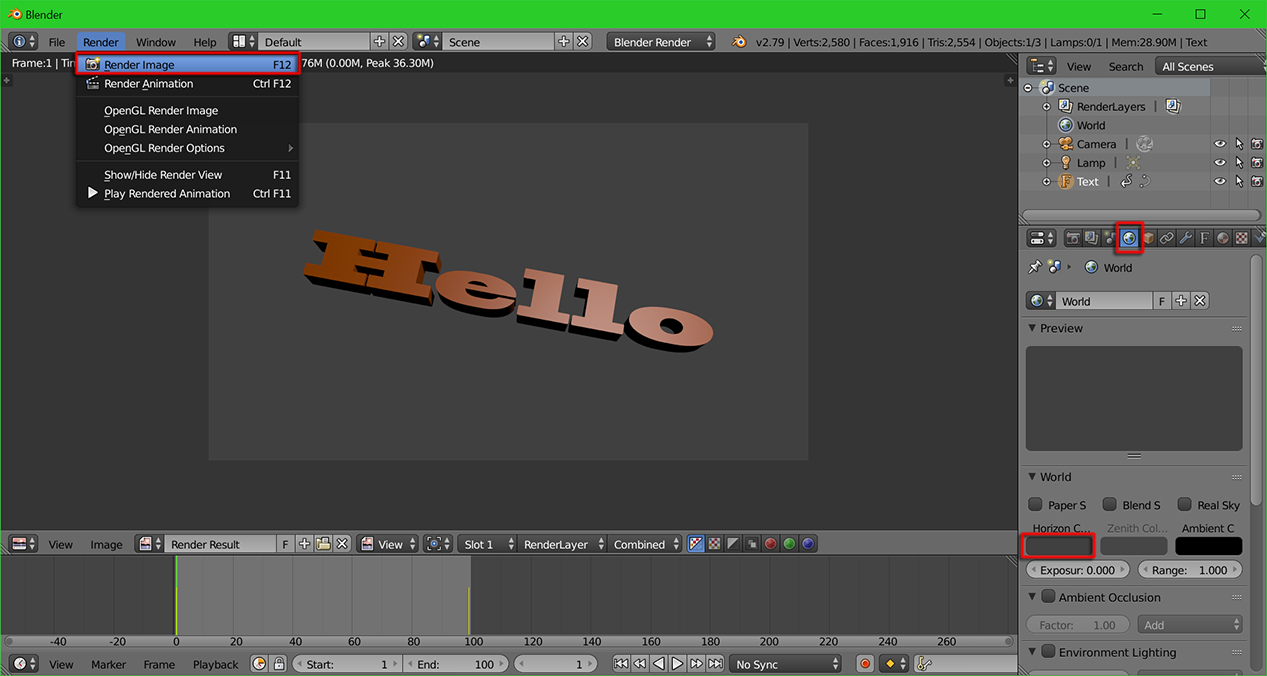
18. Render Image (F12) to preview the result. Let's change the bkg. to a world colour.
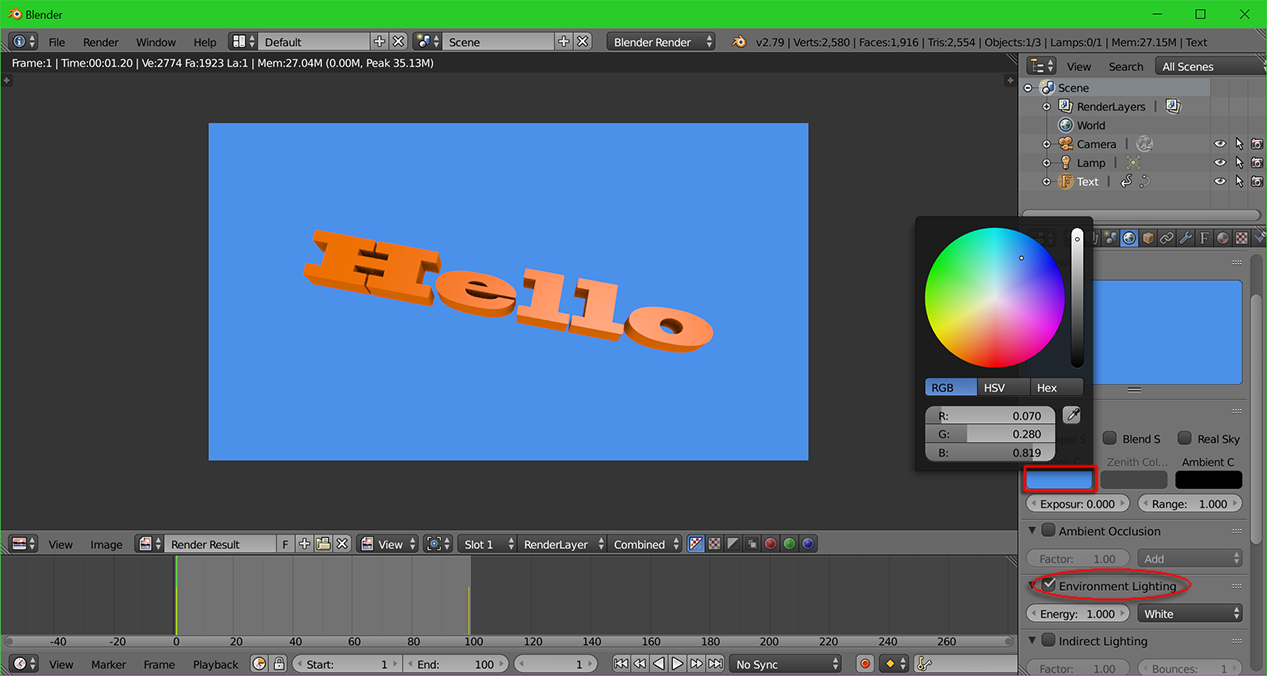
Goto the "World" panel inside the Properties window. Click "Horizon Colour" and change it to blue alike the images underneath
Goto the "World" panel inside the Properties window. Click "Horizon Colour" and change it to blue alike the images underneath
19. Turn on the "Environment Lighting" under the "Ambient Occlusion" section
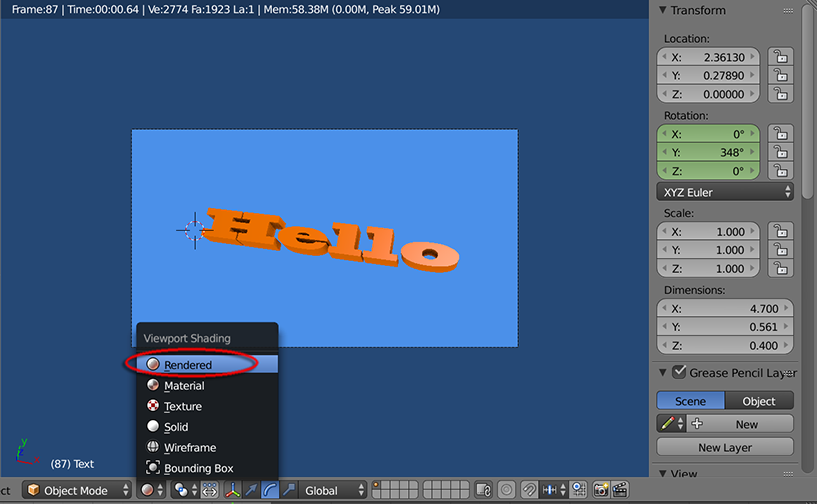
20. Goto different frames in the animation and check out their render results, ie., frame 25, 50, and 75
* You could see the hardware render by switching to "Rendered" Preview Mode
21. Goto the "Render Setup" Panel, check out the resolution size of the animation film
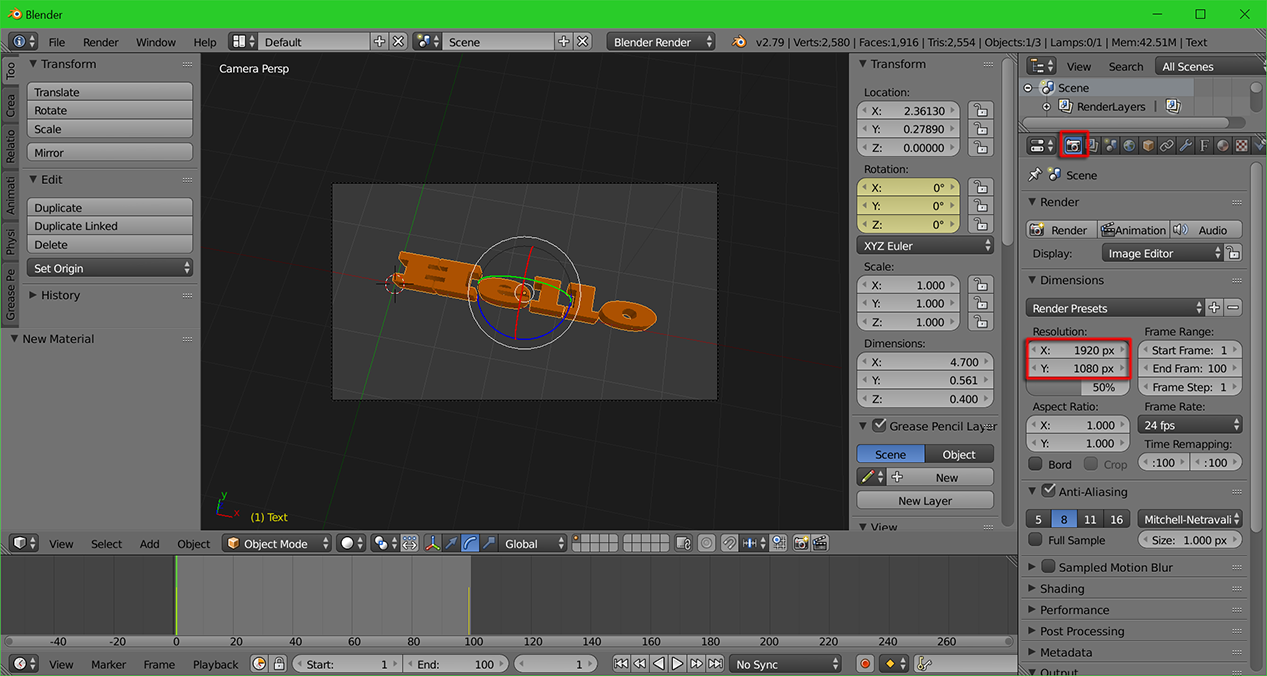
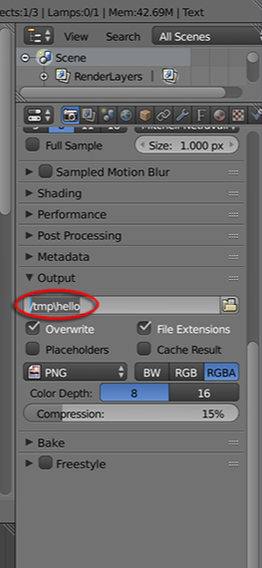
22a. under "Output" section, choose the render path and type in a Name (hello) for the output film.
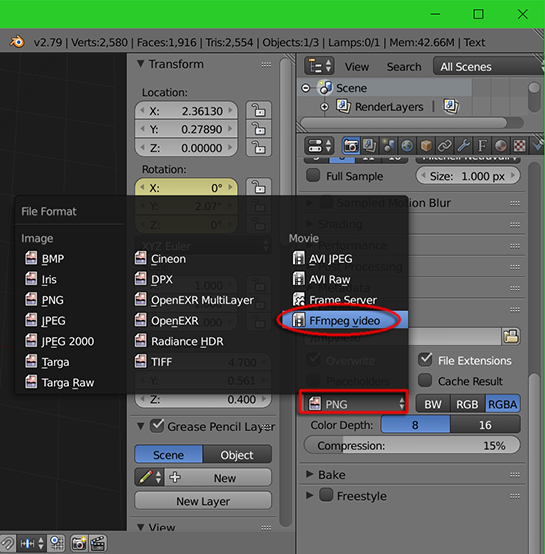
22b. click into "File Format" and choose "FFmpeg_video".
22b. click into "File Format" and choose "FFmpeg_video".
|
|
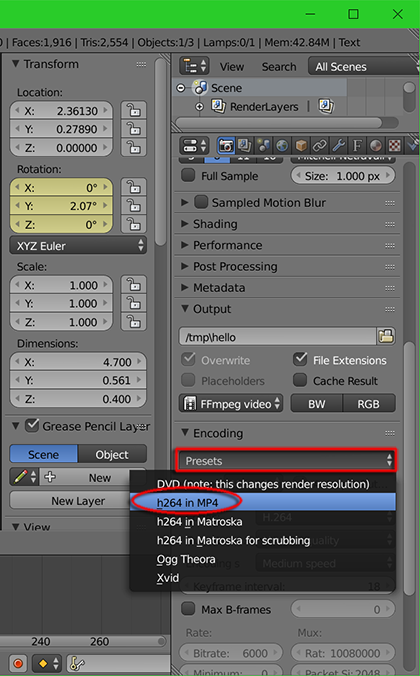
22c. click into "Presets" and choose "h264 in MP4" encoder
22d. double check all the settings
22d. double check all the settings
|

|
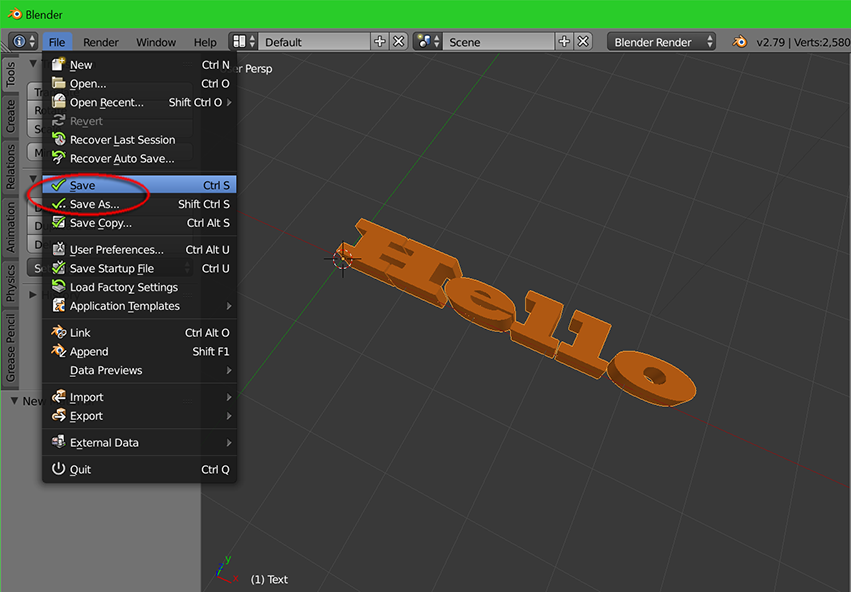
23. Save this Blender Project by goto File > Save As... or Save
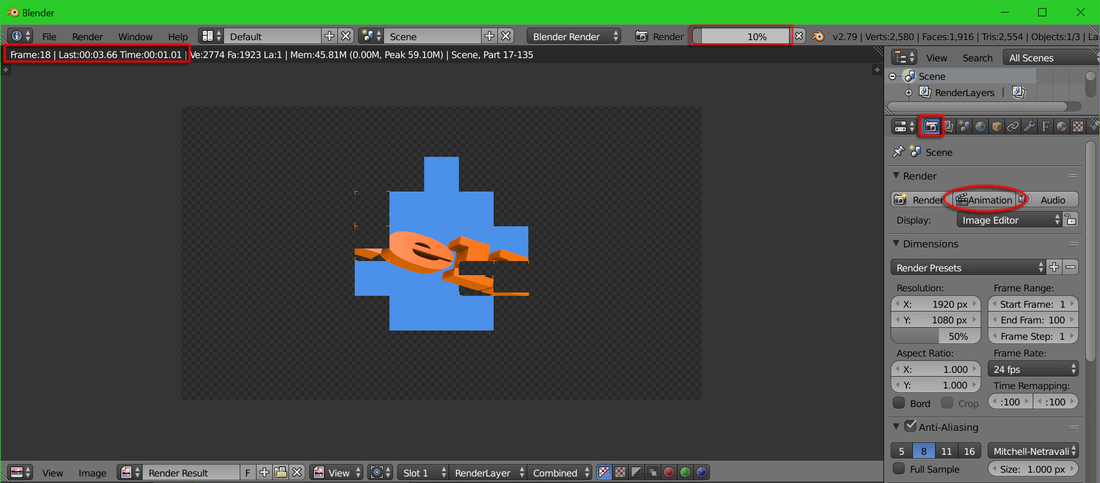
24. Inside "Render Setup" Panel, hit the "Animation" button and wait for the rendering (this scene takes only a few mins.)
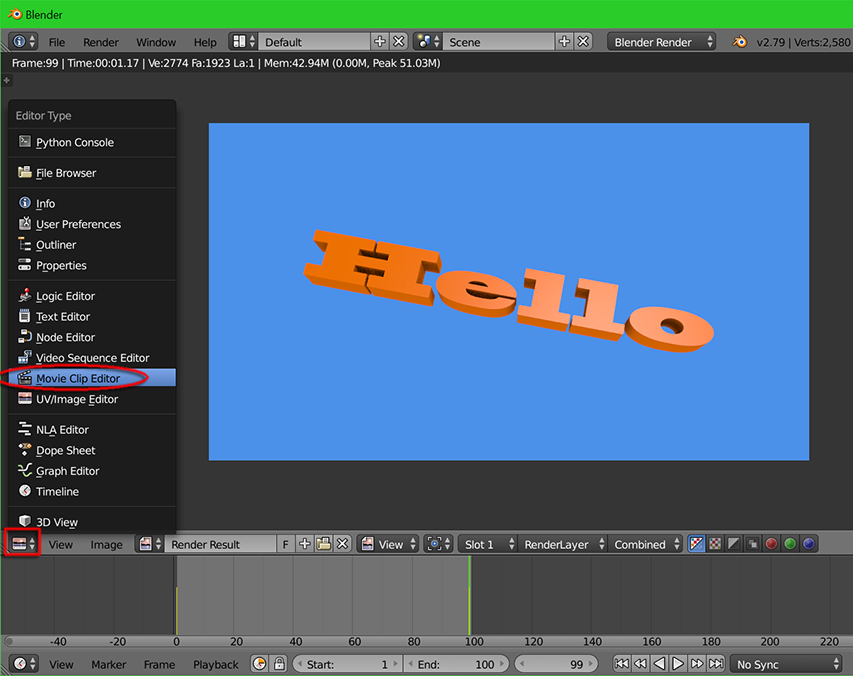
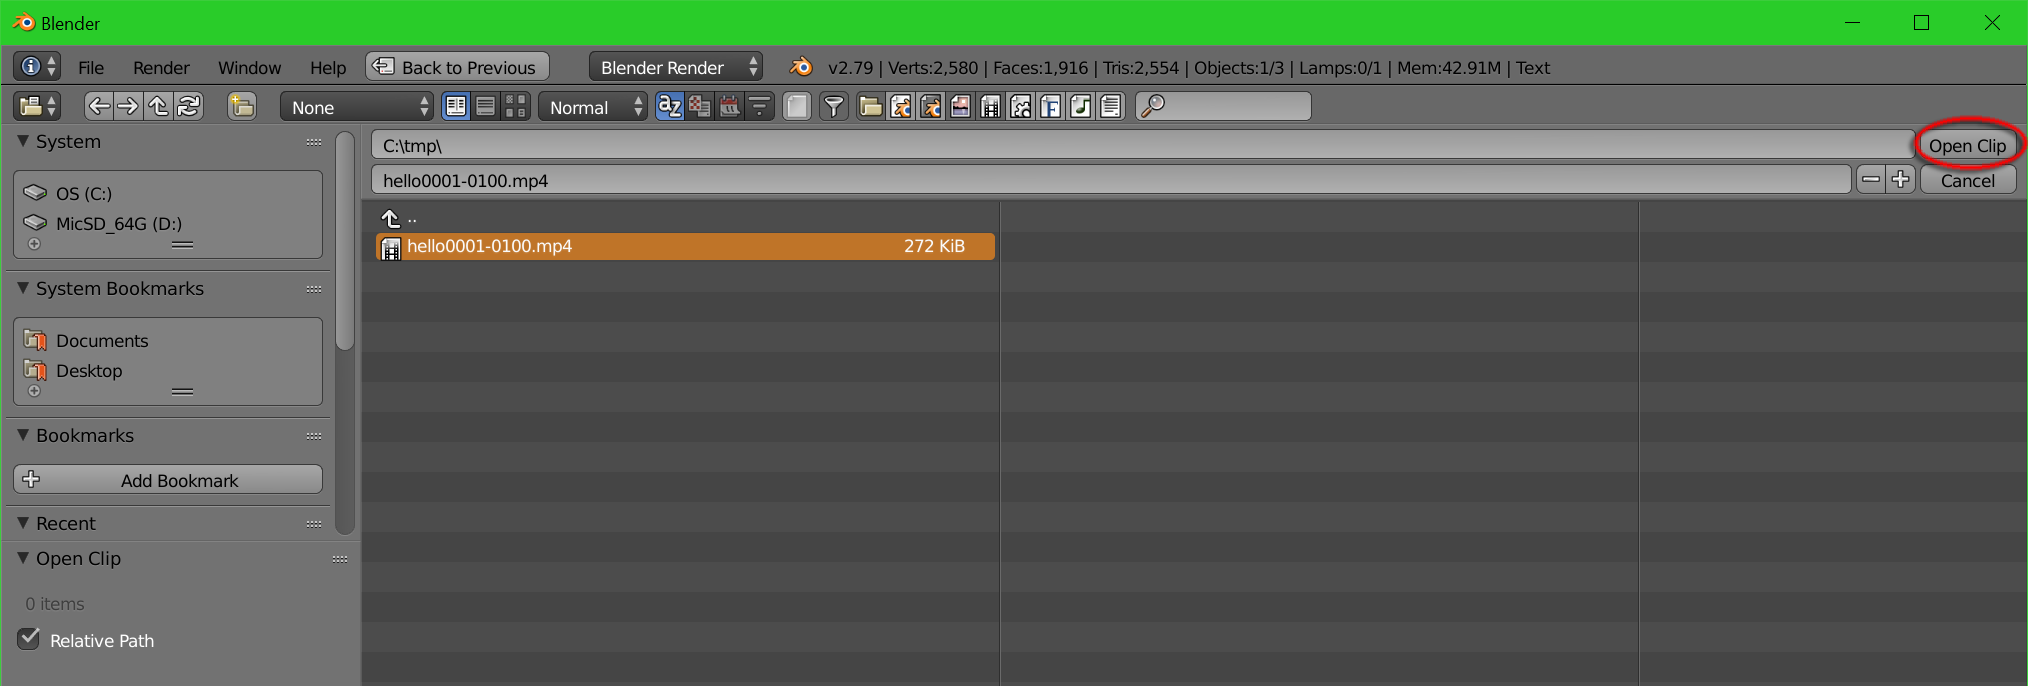
25. Once the render is completed. Change the window to "Movie Clip Editor"
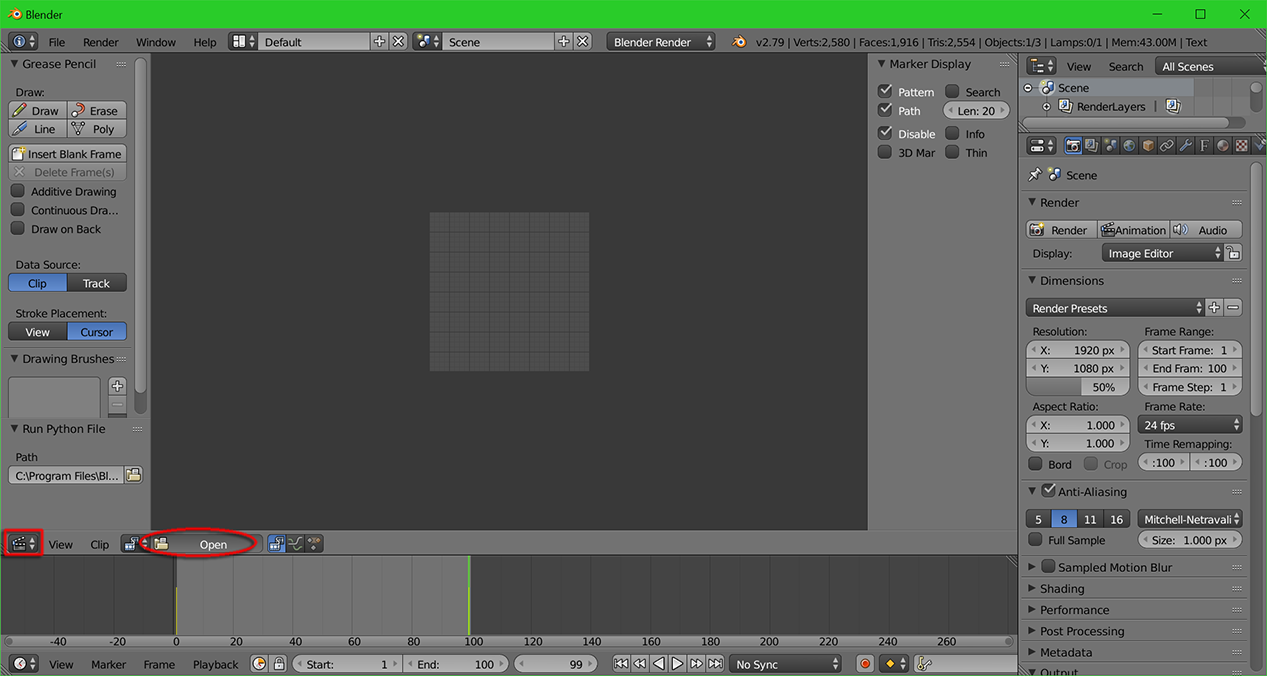
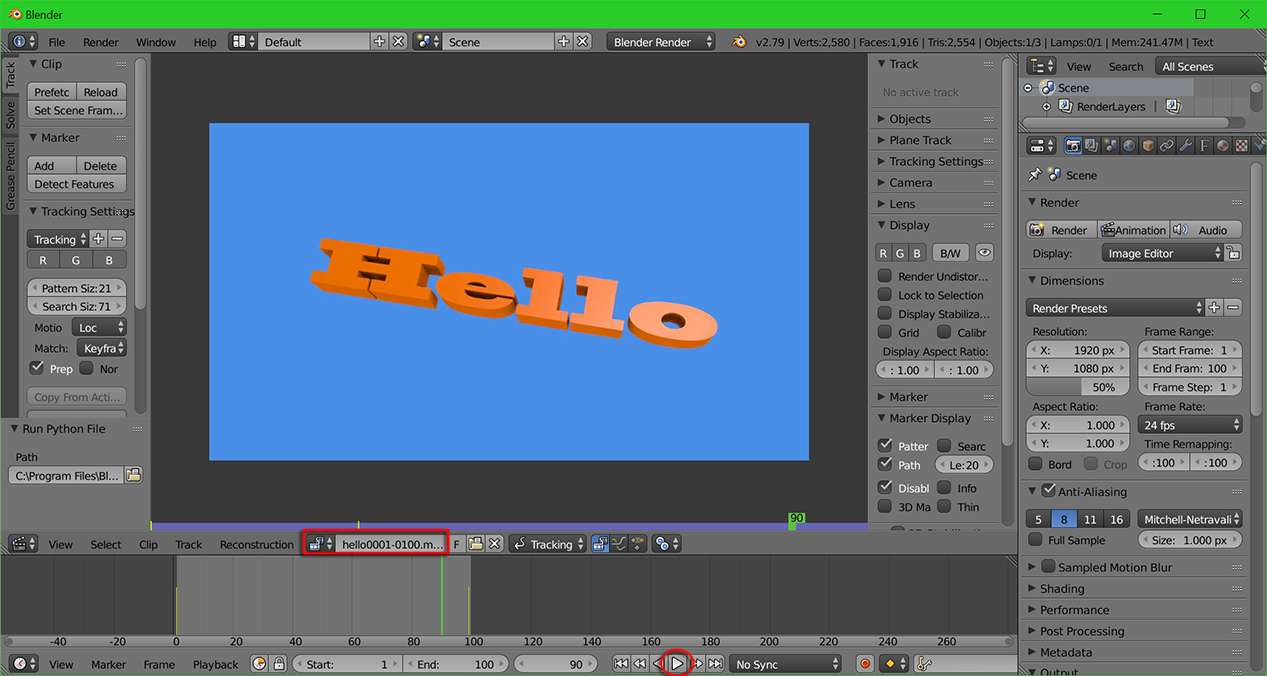
26. Click "Open" inside the Movie Clip Editor and choose the "hello" MP4 movie file. Play this file inside "Timeline" to see the final animation result
** You can complete this scene adding another text object "World"

|
Download our Hello World Blender Scene
| ||
|
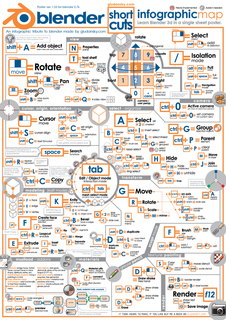
v2.7x Infographic map from giudansky.com (alike image on the right)
- http://www.giudansky.com/design/51-blender-map Official tutorials - http://www.blender.org/support/tutorials/ Official Manual - http://www.blender.org/manual previous workshop notes in osmm.hk BornCG Channel - https://www.youtube.com/user/cgboorman |
|
